Made in Builder.io

Join us for an AI launch event by

Builder.io and Figma
Talk to Us
Product
Developers
Talk to Us

Blog

Home

Resources

Blog

Forum

Github

Login

Signup

×

Visual CMS

Drag-and-drop visual editor and headless CMS for any tech stack

Theme Studio for Shopify

Build and optimize your Shopify-hosted storefront, no coding required

Resources

Blog

Get StartedLogin

growth plans

When you schedule content in the Visual Editor, you can view and edit those scheduled content entries in Builder Scheduler. The Scheduler displays your scheduled content in a familiar calendar view, which shows all scheduled entries for a given time frame.

You can display your scheduled content entries in a month calendar view, by week, by day, or by agenda.
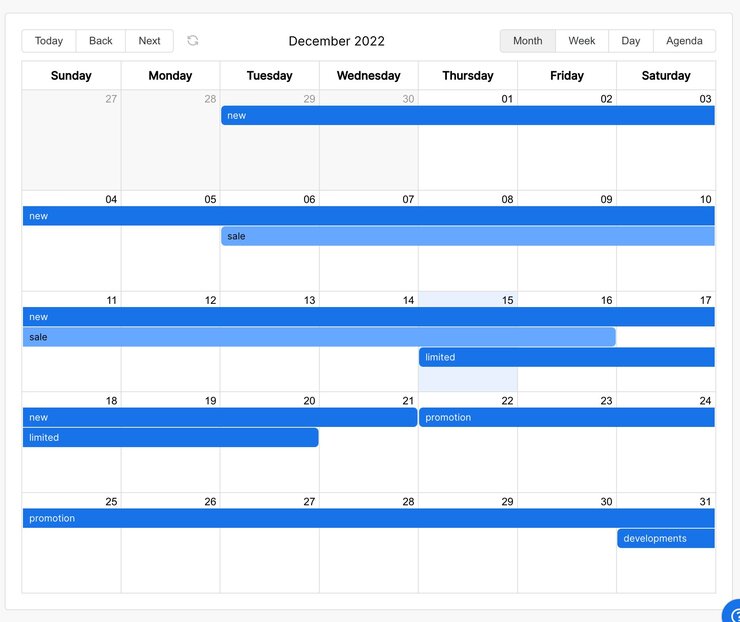
Screenshot of the Scheduler Calendar View with some scheduled content entries.
  • To access the Scheduler, you must have a paid plan.
  • To use the Scheduler's features, make sure you have content entries that are already scheduled. For more detail on scheduling content, see Targeting and Scheduling Content.
  1. Make sure you have some scheduled content.
  2. Go to Scheduler. If you have any scheduled content for the time frame on display, that content entry shows on the calendar.
  3. Click a scheduled content entry to view or edit its dates.
  4. To save your changes, click the Update Schedule button.

The following video demonstrates these steps.

While you can remove or edit scheduling in the Visual Editor, you can also edit dates from within the Scheduler. To remove a date:

  1. Go to Scheduler.
  2. Click a scheduled content entry.
  3. Click on the date you'd like to remove.
  4. Press Delete.
  5. To save your changes, click the Update Schedule button.

The following video demonstrates these steps.

Tip: If you remove both dates for an entry in the Scheduler and click Update Schedule, that entry is no longer scheduled. To schedule a content entry, follow the steps in Scheduling content.

While scheduling helps you publish content entries at the right time, you can combine targeting with targeting to make sure that the content reaches the right people at the right time. For more detail on how to use these features together, see Targeting with Builder.


Looking to hire a third party to help with your project?

Submit a project request and our partnerships team will reach out to connect you with an Expert from our partner ecosystem.

Connect with us

Was this article helpful?

Product

Visual CMS

Theme Studio for Shopify

Sign up

Login

Featured Integrations

React

Angular

Next.js

Gatsby

Get In Touch

Chat With Us

Twitter

Linkedin

Careers

© 2020 Builder.io, Inc.

Security

Privacy Policy

Terms of Service

Get the latest from Builder.io

Developer Newsletter

Latest tips, tricks, and news for frontend developers from our blog

Product Newsletter

Latest features and updates on the Builder.io platform

By submitting, you agree to our Privacy Policy

Product

Features

Pricing

What's New

Developers

Builder for Developers

Developer Docs

Open Source Projects

Performance Insights

Headless CMS: Visual Guide

Resources

Documentation

Blog

Community Forum

Templates

Partners

Submit an Idea

Use Cases

Landing Pages

Headless CMS

Headless Storefront

Customer Showcase

Customer Success Stories

Builder.io logo

Visually build and optimize digital experiences on any tech stack. No coding required, and developer approved.

Get Started

Log In

Product

Features

Pricing

Integrations

React.js

Next.js

Gatsby

Angular

Vue

Nuxt

Hydrogen

Salesforce

All Integrations

Use Cases

© 2023 Builder.io, Inc.

Security

Privacy Policy

SaaS Terms