When localizing content, you can set up localization directly within Builder or you can integrate with Smartling. With Smartling you can connect with multiple projects.
This document covers the following:
To get the most our of this tutorial, you should have already have the following:
To integrate Smartling with Builder you need to get a a few pieces of info from Smartling so the two can connect with one another.
- From your Smartling dashboard, go to Account Settings > API.
- In the Account Tokens section, click the New Token button. Account tokens help you connect to multiple projects.
- Name your token and click the Create button.
- When the success message displays, leave it open or copy the info. The info you need to integrate with Builder are the AccountUID, your User ID, and the Secret Token. The Secret Token, which you need for Builder, isn't viewable after you've closed this notification.
The following image is a screenshot of the API page with the info you need for Builder.

Tip: For more information on Smartling API Tokens, refer to Introduction to Integrating Smartling.
With the Smartling API page still open, go to Builder in another tab.
- In Builder, go to Integrations.
- Click Advanced Configuration at the bottom.
- In the dialogue that opens, click Add Plugin and enter
@builder.io/plugin-smartling. Click Save. - When the page reloads and prompts you to continue configuring Smartling, click the Configure button.
- In the dialogue that opens, enter your AccountUID from Smartling, your User ID, and the Token Secret.
- Click the Connect Your Smartling Account button.
The following video demonstrates this process:
Within the Builder Visual Editor:
- Publish your content.
- Click the three dots in the upper right of the Visual Editor and select Add to translation job.
- In the Smartling Translation Jobs dialogue that opens, click the + Create button.
- Enter a name for the translation job. Click Ok. Builder displays a confirmation message at the bottom of the screen and adds the translation job to the CMS Data models section on the left of the Content page.
- In Content, Click on the Translation job model on the left.
- Open the new translation job entry you just created by clicking on it in the content entry list.
- Fill out the Description and add any Entries as needed.
- Under the Job details section, click Choose Project and select the project based on the source.
- Under Target Locales, select the target locale(s). The locales in this list are the locales set up in Smartling previously.
- Click the Authorize button in the upper right of the UI.
When you click Authorize, Builder puts the entries in JSON files and sends them with the instructions and job description to the project with the target locales. When the process is complete, Builder generates a notification stating "Authorized translation job in Smartling".
If you click on the notification, you'll be redirected to the job in Smartling where you can click on the job and see more details.
After you get the notification, click the three dots menu and select Apply Translation.
To view the translation job working in Builder, make sure you've enabled the Studio tab so you can switch locales and see the text blocks translate.
- Go to the Studio tab.
- Select your content entry.
- Click the Show Targeting button to change locales.
To exclude a Text block from translation:
- Right click on the Text box to open the context menu.
- Select Exclude from future translations.
To toggle translations back on later, follow the same steps using the context menu to include for future translations.

Tip: If you copy and paste a block on which you've toggled translations off, that setting persists in the duplicate block. If you need that new block to translate, right click on the block and choose to Include in future translations.
The following video demonstrates toggling translation off for a block:
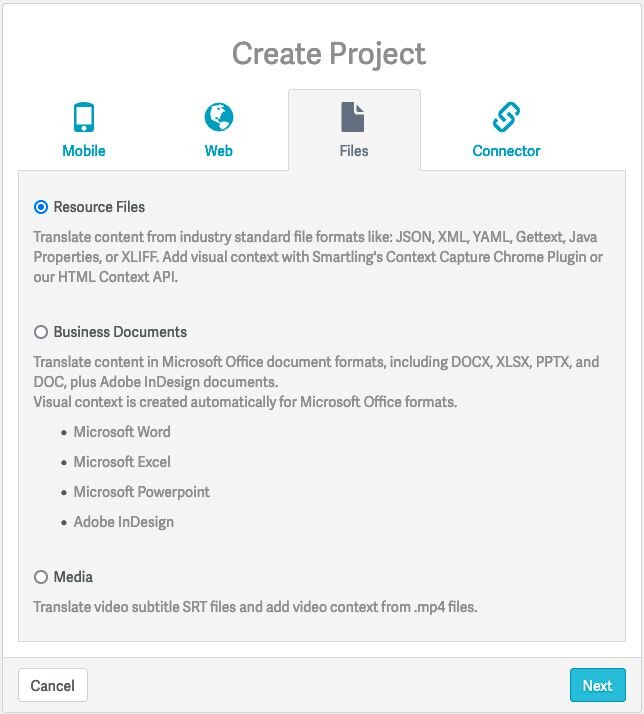
Builder can only select and sync projects that are of the file types listed in Smartling. These include JSON,XML. YAML, Gettext, Java, Properties, or XLIFF. The image below shows where these file types are listed in Smartling:

For more information on localization in Builder, check out the documentation on Localization with Builder.


