Using Builder's GenUI with Your Design System | 6/12

Announcing Visual Copilot - Figma to production in half the time

Builder logo
builder.io
Contact SalesGo to App

Using Builder's GenUI with Your Design System | 6/12

Announcing Visual Copilot - Figma to production in half the time

Builder logo
builder.io

Blog

Home

Resources

Blog

Forum

Github

Login

Signup

×

Visual CMS

Drag-and-drop visual editor and headless CMS for any tech stack

Theme Studio for Shopify

Build and optimize your Shopify-hosted storefront, no coding required

Resources

Blog

Get StartedLogin

MCP (Model Context Protocol) servers extend Projects capabilities by connecting it to external tools and services. This allows the AI to access and interact with your existing business systems, from project management tools to documentation platforms.

MCP servers give the AI model awareness of external tools and services it can access. Instead of being limited to its built-in capabilities, Projects can integrate with your existing workflow tools through these protocol connections.

For details about the Model Context Protocol, visit the official MCP documentation.

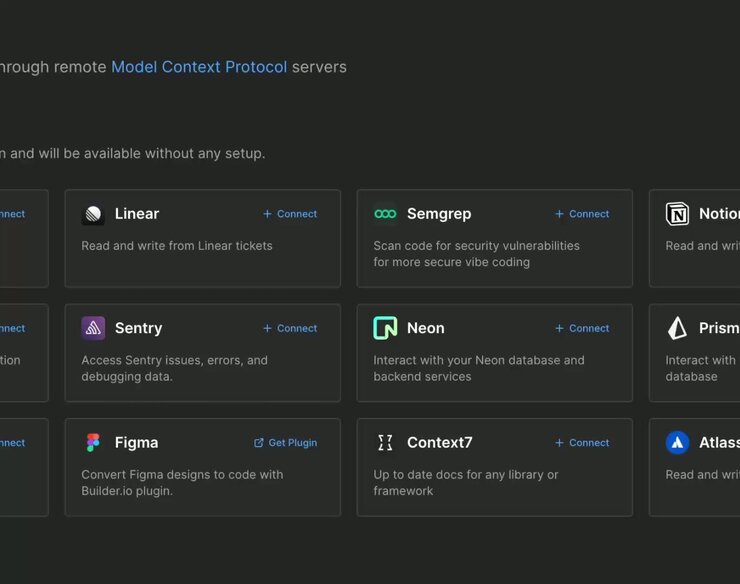
Projects includes ready-to-use integrations with popular enterprise tools.

To connect a built-in integration:

  1. Go to MCP Servers.
  2. Click + Connect on the built-in integration tile for your chosen service and provide the requested data when prompted.

The video below shows where to connect one of the Built-in integrations, in this case, Atlassian:

Connect to Jira and Confluence through OAuth authentication. Once connected, Projects can:

  • Access Jira tickets and Confluence
  • Automatically fix issues

More built-in integrations, such as Google Drive, Supabase, and Zapier are in active development.

enterprise plans

Enterprise customers can build and deploy their own MCP servers using the remote Model Context Protocol standard. This provides a way to:

  • Connect Projects to proprietary internal tools
  • Integrate with custom APIs and databases
  • Extend Projects capabilities to match your specific workflow needs

To connect your custom MCP Server:

  1. Go to MCP Servers.
  2. In the Your Custom Servers section, click + Add Your First Server.
  3. In the dialogue that opens, provide the Server Name, the Server URL, and the optional Authorization Token.

The video below shows where to connect your custom server:

After you have configured your MCP servers, they are available within your Projects workspace. To display all connected MCP servers in the Projects interface:

  1. Open one of your Projects on the Projects page.
  2. On the Generate tab, click on the MCP Servers icon to open the MCP Server dialogue.

Once connected, the AI automatically leverages these services when relevant to your tasks, with MCP servers enhancing Projects capabilities in the background.

For example, when working on a development task, Projects can automatically access related Jira tickets, understand the requirements, and even implement fixes based on the ticket context.

The video below shows where to find the MCP Servers in the Projects interface with an open project:

For more information on working with Builder Projects and Builder's AI, visit:

Was this article helpful?

Product

Visual CMS

Theme Studio for Shopify

Sign up

Login

Featured Integrations

React

Angular

Next.js

Gatsby

Get In Touch

Chat With Us

Twitter

Linkedin

Careers

© 2020 Builder.io, Inc.

Security

Privacy Policy

Terms of Service

Get the latest from Builder.io

By submitting, you agree to our Privacy Policy

  • Platform Overview

    AI Overview

  • Integrations

  • What's New

  • Figma to Code Guide

  • Composable Commerce Guide

  • Headless CMS Guide

  • Headless Commerce Guide

  • Composable DXP Guide

  • Design to Code

  • Blog

  • Knowledge Base

  • Community Forum

  • Partners

  • Templates

  • Success Stories

  • Showcase

  • Resource Center

    Glossary

© 2025 Builder.io, Inc.

Security

Privacy Policy

SaaS Terms

Compliance

Cookie Preferences

Gartner Cool Vendor 2024