Data binding is how data from Builder or your application can be connected to your Pages. Data binding connects data from Builder or your application to your Pages, so you can build dynamic, interactive pages without code.
- Data refers to any information affecting your application, from product details to your design theme.
- Builder can access data from Builder Data Models, third-party tools, or custom sources provided by your organization's developers.
- The Visual Editor has a Data tab that provides a way to connect data to your application.
Your application likely relies on all kinds of data. Builder categorizes the data your application may use into three different categories:
- Third-party Data: Information stored in another tool your organization utilizes, such as Salesforce or Shopify.
- API Data: Information only your company can access through its own software. Your organization's software developers can access this data and make it available in Builder.
- Builder's Data Model: Information stored within a Builder Data Model. This data is added using a standard form and does not require technical knowledge.
You can access all these data types in the Visual Editor. Once you can access your data, you can build a Page dependent on that data.
Example
The video below shows a travel blog created entirely within Builder.
Data binding in Builder means you can:
- Dynamically display content, such as a blog post’s title, author, and image, using a Builder Data Model.
- Automatically repeat elements when multiple data entries exist — new blog posts appear without needing adjustments in the Visual Editor.
- React to user interactions without code — for example, clicking No thanks hides the callout.
Data Models in Builder are pure data, which means there is no drag-and-drop aspect. You can customize the fields available on a Data Model and then create individual pieces of data that match the Model.
Examples of use cases for Data Models include:
For more information on Data Models, see Create Data.
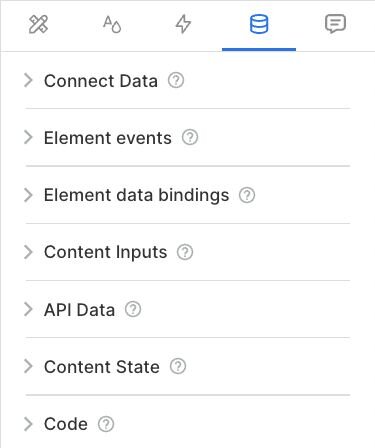
In the Visual Editor, the Data tab provides access to third-party, API, and Builder data models. The Data tab uses the database icon and contains several panels:
- Connect Data
- Element events
- Element data bindings
- Content Inputs
- API Data
- Content State
- Code

See Create Data and Connect Data to create and connect data. Then, see Bind Data to use it on your Page.


