Cursor for Designers Tutorial #1: Vibe-Code with the Visual Editor
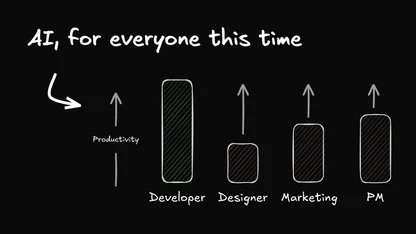
Designers are getting pushed closer to code—fast.
Not because every designer needs to become a full-time engineer, but because modern product work increasingly lives in systems: design decisions ship through components, UI changes happen in repos, and the fastest teams don’t treat Figma and production code as separate worlds.
That shift can feel intimidating… or it can become your leverage.
Designers who learn agentic workflows can move dramatically faster: faster prototyping, faster iteration, and less handoff friction. Tools like Cursor make that possible by helping you set up projects, generate UI, and refine it with a mix of chat + visual editing.
This tutorial is the first in a tutorial series on Cursor for Designers:
- Greenfield / vibe-coding UI workflows (you are here)
- Working inside an existing product repo
- Figma → production code translation
You can start with any tutorial: they are all fully standalone.

In this guide, we’ll focus on greenfield UI prototyping: going from an empty workspace to a working, editable UI using Cursor’s chat, built-in preview, and Visual Editor. If you’re new to Cursor, this is the best place to start.
This Cursor tutorial is for you if:
- You’re a product designer, UX designer, UI designer, or brand designer getting pushed closer to implementation
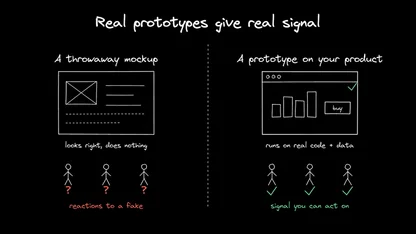
- You want to prototype functional UI, not just static mockups
- You want to use Cursor’s Visual Editor and built-in preview
- You don’t want terminal/Git command fluency to be the blocker
This tutorial is not primarily about:
- Editing existing production codebases (that’s Part 2)
- Translating Figma into production-safe code (that’s Part 3)
If your team already handed you a GitHub repo link, start with Part 2. If your work starts in Figma and your main pain is handoff drift, jump to Part 3.
What you'll learn in part 1
In this tutorial, you’ll learn how to:
- Prompt Cursor to scaffold a new UI project
- Have Cursor install dependencies and start local dev
- Open localhost in Cursor’s built-in preview
- Generate a UI layout from prompts
- Refine visually in Cursor’s Visual Editor
- Extract reusable components early
- Iterate with design-direction prompts (not just code edits)
And by the end, you’ll have a repeatable workflow you can use in real product work—not just a one-off demo.
What you'll ship by the end
By the end of this tutorial, you’ll have:
- A running local app visible inside Cursor
- A dashboard-style UI prototype
- Reusable components (for example: sidebar, header, stat card)
- A repeatable greenfield workflow for rapid UI exploration
Requirements
- Cursor downloaded to your local machine
- You can also complete this tutorial using Builder.io instead. Same prompts with less setup
How to vibe-code new UIs in Cursor
The fastest way to build confidence in Cursor is to do some good old-fashioned vibe coding.
The goal here is simple: describe UI intent → generate UI → refine visually → iterate safely. Let's get started.
Step 1 — Open a new project folder in Cursor
Create or open a new folder in Cursor for your prototype. Example:
designer-dashboard-prototype
If Cursor asks whether to trust the workspace, choose Trust.
✅ Checkpoint: You have an empty project folder open in Cursor.
Step 2 — Prompt Cursor to scaffold the project
In Cursor chat, prompt:
“Create a new Next.js + Tailwind project in this folder optimized for rapid UI prototyping. Keep the setup simple and explain what you’re doing as you go.”
Optional stronger version (if you want a useful first screen immediately):
“Create a new Next.js + Tailwind project in this folder and scaffold a basic dashboard route with a sidebar and analytics cards. Keep it beginner-friendly.”
If Cursor starts giving you manual CLI steps, redirect it:
“Please do this for me inside the workspace and tell me when it’s ready.”
✅ Checkpoint: Cursor scaffolds the project and you can see generated files.
Step 3 — Prompt Cursor to install dependencies and start local dev
Prompt:
“Install dependencies and get the local dev server running for this project. Use Cursor’s built-in workflow and tell me the localhost URL when it’s ready.”
If something errors:
“Fix this step by step. Assume I’m a designer. Do the setup work for me and explain the issue simply.”
✅ Checkpoint: Cursor gives you a localhost URL (often http://localhost:3000).
Step 4 — Open localhost in Cursor's built-in preview
Stay inside Cursor. You app probably automatically opened to the right of the Agent window. If it didn’t, do this:
- Press Ctrl+Shift+P to open the Command Palette
- Type Simple Browser: Show and run it.
- Enter the localhost url you requested in Step 3. For our demo app, this is
http://localhost:3000.
✅ Checkpoint: You can see the running app inside Cursor.
This is a major milestone: you can run and view local UI without leaving the editor.
Step 5 — Generate the first UI layout
If Cursor did not already create a dashboard UI, prompt it to do so:
“Create a SaaS dashboard layout with a left sidebar, top header, and a main grid of analytics cards. Make it feel clean and modern.”
Do not chase perfection yet. You want a first pass with:
- A layout structure
- A visual hierarchy
- Editable UI that you can refine
Review the diff before accepting.
✅ Checkpoint: You have a visible dashboard UI with a sidebar, header, and cards.
Step 6 — Ask Cursor which file controls the screen
Prompt:
“Which file renders the dashboard layout you just created? Open it and point out the main layout section.”
This is how designers build codebase orientation without manual hunting.
✅ Checkpoint: You can see the file controlling the screen.
Step 7 — Open the CSS Inspector
Look for the three icons in the menu of the live preview pane. Click the sidebar icon to open the CSS inspector. You can also press the cursor icon beside it and then select any UI element.
✅ Checkpoint: You can edit the UI and see the result live in Cursor preview.
Prompt:
“Open this screen in Visual Editor.”
Now refine visually:
- Spacing
- Alignment
- Typography hierarchy
- Card padding
- Visual rhythm
- Density
This is where “generated UI” turns into “designed UI.”
✅ Checkpoint: The page looks more intentional than the first AI draft.
Step 8 — Use AI + Visual Editor together (hybrid workflow)

Use chat for broad changes:
“Increase density slightly. Reduce visual noise. Keep the layout structure the same. Refine spacing and typography only.”
Then use Visual Editor for the final polish:
- Tighten gaps
- Align edges
- Rebalance heading sizes
- Normalize card spacing
This hybrid loop is the real skill:
- AI for speed
- Visual Editor for precision
✅ Checkpoint: You can direct and improve the UI quickly without manually writing everything.
Step 9 — Extract reusable components early
Prompt:
“Refactor this page into reusable components. Create
Sidebar,DashboardHeader, andStatCard. Keep styling consistent. Do not change behavior or layout.”
Review the diff before accepting.
Look for:
- Repeated UI extracted cleanly
- No unnecessary rewrites
- Unchanged behavior
If Cursor over-refactors, say:
“Undo the refactor and make minimal changes. Extract components only.”
✅ Checkpoint: You now have reusable components instead of one giant page file.
Step 10 — Iterate like a designer (art direction prompts)
This is your greenfield superpower: art-direct the UI through prompts.
Try prompts like:
“Make this feel more enterprise and less playful. Keep the layout. Update typography, spacing, and card styling.”
“Reduce the number of visual accents. Use cleaner separation and stronger hierarchy.”
“Improve scanability: make labels quieter and metrics more prominent.”
“Increase information density slightly without making it feel crowded.”
Always review the diff before accepting.
✅ Checkpoint: You can guide the UI intentionally and get predictable results.
Optional step 11 — Save a milestone (without Git commands)
If you want to practice a more professional workflow:
“Create a Git commit for this current state with a clear message describing the dashboard UI prototype. Explain what changed in one short paragraph.”
You do not need command fluency for this tutorial. You do need the habit of saving meaningful milestones.
Common failures in greenfield AI workflow (and what to say)
You will break things. Everyone does.
If the AI agent rewrote the whole page
“Undo the refactor. Restore the original structure. Apply only minimal visual changes.”
“Standardize spacing and typography hierarchy. Use a consistent scale across cards and headings.”
“Show me exactly which file renders this screen and highlight the main layout section.”
“Explain this error simply. Fix it step by step. Do the setup work for me where possible and tell me what changed.”
“Open this in Visual Editor and help me fine-tune spacing, alignment, and hierarchy without refactoring the structure.”
“Use Cursor’s built-in browser/preview and Visual Editor for localhost. Don’t make me switch to an external browser.”

Cursor is excellent for learning the core muscle of AI-assisted UI work—especially for solo prototyping and greenfield exploration.
As teams get more collaborative, though, the bottleneck often shifts from “can I generate the UI?” to “can multiple people review and ship UI changes cleanly?” That’s where visual-first team workflows start to matter more, and where a platform like Builder.io can be a stronger fit for design-heavy teams.
If you’re hitting that wall, you’ll feel it more clearly in Part 2 (existing repo) and especially Part 3 (Figma → code).
FAQ: Cursor for designers
Do designers need to learn coding to use Cursor well?
Not in the traditional “become a software engineer” sense.
But designers do need to learn how codebases work: how projects run locally, how components are organized, how to make safe UI changes, and how to review diffs before accepting them. The goal is not mastering programming theory. The goal is shipping design changes reliably.
Is Cursor only useful for vibe coding and prototypes?
No. That’s the most common starting point, but it’s not where the biggest value is.
The real leverage comes when designers use Cursor in existing product repos and for Figma → production code translation. That’s where agentic workflows reduce handoff time, speed up iteration, and help designers ship without breaking logic.
What is the best Cursor workflow for product designers?
The best workflow is a combination of three modes:
- Greenfield vibe coding for fast prototyping
- Existing repo editing for real product work
- Figma → code translation for accurate implementation
If you only learn vibe coding, you’ll get fast at mockups. If you learn all three, you’ll get fast at shipping.
How can designers avoid breaking functionality when using Cursor?
Use a few rules consistently:
- Say “keep logic intact” in your prompts
- Make small diffs
- Reuse existing components and tokens
- Review changes before accepting
- Test the UI locally in Cursor preview (links, buttons, forms, responsive states)
Cursor is powerful, but you still need to constrain it.
Should designers use Cursor’s Visual Editor or just chat prompts?
Both.
Use chat prompts to make structural changes, refactors, or multi-file updates. Use the Visual Editor to fine-tune spacing, hierarchy, typography, and layout details. The strongest workflow is hybrid: AI for speed, visual editing for precision.
Do I need Git to use Cursor as a designer?
You do not need to know Git commands to start.
For team/product work, you still need the workflow concepts: branches, commits, and pull requests. Cursor can help you perform many of those steps, but you should understand what they mean and why they protect your team.
How do I translate Figma to code with Cursor without creating inconsistent UI?
Prompt Cursor to reuse the existing system:
- Existing components
- Existing spacing scale
- Existing typography patterns
- Existing color tokens
Then use Figma specs/screenshots to guide layout and spacing changes. The key is to match the design while preserving the product’s system conventions.
What should a designer review before accepting Cursor changes?
At minimum, check:
- Were any links/handlers removed?
- Did Cursor refactor logic you didn’t ask it to change?
- Does the UI still work locally?
- Do hover/focus/responsive states still behave correctly?
- Does the change match the design system patterns already in the repo?
You’re not just reviewing visuals. You’re reviewing shipping risk.