10/16 demo: Build apps faster with AI and your design stack

What are best AI tools? Take the State of AI survey

Builder.io
Builder.io
Contact sales
‹ Back to blog

AI

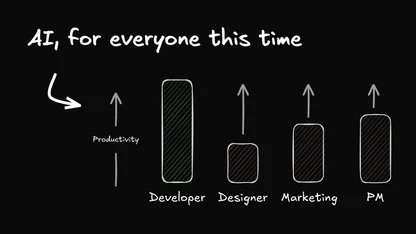
Create Apple-style scroll animations with CSS view-timeline

October 14, 2025

Written By Steve Sewell

How does Apple make this crazy transition where, as we change sections, the video changes with it?

Let me show you how to recreate that silky smooth feel using CSS view timelines.

Start with a real page, fast

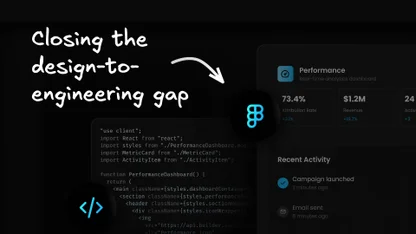
I use Builder.io’s Import from Web to reproduce the layout of the page quickly so I am working against real markup, not a toy. Paste the imported section, iterate in chat, and you have a solid starting point.

The key ingredients

We need three things.

  1. A video container that is sticky so it stays pinned while we scroll the text.
  2. A stack of videos inside that container, each absolutely positioned on top of the last.
  3. A wipe animation that clips each video away at the right moment as the next section comes into view. The animation is driven by CSS view timelines so scroll and animation are perfectly in sync.

Make the video container sticky

This keeps the display in place while the content scrolls underneath. The container leaves when its section ends.

<div class="video-frame sticky top-1/2 -translate-y-1/2">
  <!-- stacked .video-layer elements go here -->
</div>

What this is doing: position: sticky pins the frame relative to the viewport while we are inside its scroll range. top: 50% with -translate-y-1/2 centers the frame vertically so it feels anchored.

Stack the videos

Each video fills the frame and sits on its own layer.

<div class="video-frame">
  <video class="video-layer absolute inset-0" ...></video>
  <video class="video-layer absolute inset-0" ...></video>
  <video class="video-layer absolute inset-0" ...></video>
  <video class="video-layer absolute inset-0" ...></video>
</div>

What this is doing: absolute inset-0 makes every clip fill the frame. We will clip each layer away in turn so the next one becomes visible.

Name the section view timelines

Each scrolling text section needs a unique view timeline name. The container that wraps all sections sets a timeline scope so the named timelines exist.

/* Parent scroller defines the scope for our view timelines */
.scroll-clip-container {
  timeline-scope: --section-0, --section-1, --section-2, --section-3;
}

Each section declares its own timeline. I pass the dynamic inset here too, which I will cover next.

<section
  className="experience-section"
  style={{
    viewTimelineName: `--section-${index}`,
    viewTimelineAxis: "block",
    viewTimelineInset: timelineInset, // like "35% 35%"
  }}
>
  ...
</section>

What this is doing: view-timeline-name creates a scroll-linked timeline for the element. view-timeline-axis: block links it to vertical scroll. timeline-scope lets descendants reference these names with animation-timeline.

Drive the video wipes with CSS only

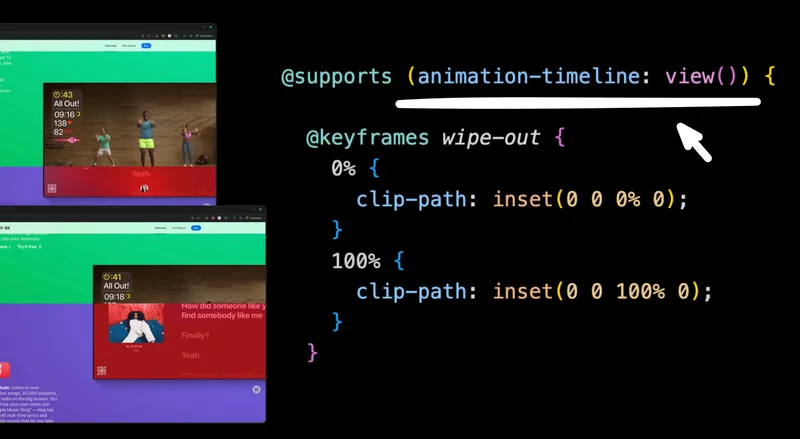
We define a simple keyframes animation that clips a layer upward. Then we attach that animation to a section’s view timeline by name. The effect is a wipe that runs exactly when the corresponding section enters and passes through the frame.

@supports (animation-timeline: view()) {
  @keyframes wipe-out {
    0%   { clip-path: inset(0 0 0% 0); }   /* fully visible */
    100% { clip-path: inset(0 0 100% 0); } /* fully clipped from bottom up */
  }

  .video-layer {
    animation: wipe-out 1s linear both;
    animation-range: entry 0% contain 0%;
  }

  /* Each video clips away according to the next section's progress */
  .video-layer:nth-child(1) { animation-timeline: --section-1; }
  .video-layer:nth-child(2) { animation-timeline: --section-2; }
  .video-layer:nth-child(3) { animation-timeline: --section-3; }
  .video-layer:nth-child(4) { animation-timeline: none; } /* last stays visible */
}

What this is doing:

@keyframes wipe-out animates clip-path from fully visible to fully clipped.

animation-timeline: --section-1 ties that animation to the scroll progress of section 1. We deliberately bind layer N to section N+1 so the current layer wipes out while the next section comes in.

animation-range: entry 0% contain 0% tells the animation when to run. It starts when the section’s entry edge hits the viewport threshold and completes when the section is fully contained. That produces an intuitive wipe during the most visible part of the section.

Keep the scroll region precise with a dynamic inset

If you do nothing, a view timeline maps the whole viewport. We want the wipe to run while the section crosses the TV frame, not while it crosses the entire page. We compute view-timeline-inset so the animation spans the frame’s top and bottom.

const videoContainerRef = useRef<HTMLDivElement>(null);
const [timelineInset, setTimelineInset] = useState("35% 35%");

useEffect(() => {
  const calculateInset = () => {
    const el = videoContainerRef.current;
    const rect = el.getBoundingClientRect();
    const vh = window.innerHeight;

    const topPercent = (rect.top / vh) * 100;
    const bottomPercent = ((vh - rect.bottom) / vh) * 100;

    setTimelineInset(`${topPercent.toFixed(2)}% ${bottomPercent.toFixed(2)}%`);
  };

  calculateInset()
  window.addEventListener("resize", calculateInset);
  return () => window.removeEventListener("resize", calculateInset);
}, []);

What this is doing:

We measure the TV container’s top and bottom relative to the viewport and convert both into percentages. That string becomes the view-timeline-inset on each section. Result: the wipe runs while the section passes the visible TV frame. Fast scroll stays in perfect sync because the browser advances the animation on the compositor.

Why CSS timelines over JS scroll handlers

You can build this with scroll events and set clip-path manually. It can look good at normal speeds, but fast fling scrolling exposes small desync and stutter because events and layout do not fire on every frame. View and scroll timelines run on the compositor. That means buttery motion and perfect sync without juggling throttles or rAF loops.

Build it incrementally with AI

There is a fair bit of wiring to get right. I am lazy so use a simpler flow to generate the code.

Here’s the main prompt I used to recreate this effect in Builder.io:

Let’s add an animation to the video container. 
The video block is centered on the page, and during scroll the old video will wipe to the next video with clip masks. 
Keep in mind the animation should be scroll locked and perfectly timed with the scroll into the new section, making it look like the videos are wiping away while scrolling between the threshold of one section to another. 
Do this with pure CSS with animation-timeline.

Browser support and fallbacks

animation-timeline: view() is supported in Chromium-based browsers and Safari. Firefox does not support it at the time of writing. Two simple fallbacks:

  • For Firefox, replace with per-section inline videos and fade between them.
  • Or use a JS scroll listener fallback that sets clip-path on scroll for that browser only. You can guard with @supports.
@supports not (animation-timeline: view()) {
  /* simple fade fallback or no effect */
}

Small tuning tips

  • Keep your keyframes simple. One clip-path animation per layer is cheap and composited.
  • Make the inset accurate. If the wipe starts too early or too late, adjust the computed percentages.
  • Preload posters and keep videos short, looped, and muted.

What we built

A sticky frame with stacked videos. Each section owns a view timeline. Each video layer listens to the next section’s timeline and wipes away using a native animation. A small resize handler computes the inset so the wipe happens while the section crosses the frame. No custom scroll math. No jitter!

import { useEffect, useRef, useState } from "react";

const VIDEOS = [
  { src: "video-1.mp4", poster: "poster-1.jpg", title: "Apple TV", copy: "Intro for section 1." },
  ...
];

export default function ScrollTimelineSwap() {
  const frameRef = useRef<HTMLDivElement>(null);
  const [timelineInset, setTimelineInset] = useState("35% 35%"); // "<top%> <bottom%>"

  useEffect(() => {
    const updateInset = () => {
      const el = frameRef.current;
      if (!el) return;
      const rect = el.getBoundingClientRect();
      const vh = window.innerHeight || 1;
      const topPct = (rect.top / vh) * 100;
      const botPct = ((vh - rect.bottom) / vh) * 100;
      setTimelineInset(`${topPct.toFixed(2)}% ${botPct.toFixed(2)}%`);
    };
    updateInset();
    window.addEventListener("resize", updateInset);
    return () => window.removeEventListener("resize", updateInset);
  }, []);

  return (
    <div className="scroll-clip-container">
      {/* Frame that visually wraps the stacked videos. */}
      <div ref={frameRef} className="frame">
        {VIDEOS.map((v, i) => (
          <video
            key={v.src}
            className="video-layer"
            src={v.src}
            poster={v.poster}
            ...
            style={{ zIndex: VIDEOS.length - i }}
          />
        ))}
      </div>

      {/* Sections that drive the view timelines */}
      <main>
        {VIDEOS.map((v, i) => (
          <section
            key={v.src}
            className="experience-section"
            style={{
              viewTimelineName: `--section-${i}`,
              viewTimelineAxis: "block",
              viewTimelineInset: timelineInset, // computed in state
            }}
          >
            ...
          </section>
        ))}
      </main>
    </div>
  );
}
/* Expose named view timelines to descendants (animation plumbing only) */
.scroll-clip-container {
  timeline-scope: --section-0, --section-1, --section-2, --section-3;
}

/* Scroll-driven wipe using CSS view timelines */
@supports (animation-timeline: view()) {
  @keyframes wipe-out {
    0%   { clip-path: inset(0 0 0% 0); }
    100% { clip-path: inset(0 0 100% 0); }
  }

  .video-layer {
    /* Duration is driven by the linked view timeline */
    animation: wipe-out 1s linear both;
    /* Start at the section's entry edge and finish when fully contained */
    animation-range: entry 0% contain 0%;
  }

  /* Bind each layer to the NEXT section’s timeline. Extend these if you add more sections. */
  .video-layer:nth-child(1) { animation-timeline: --section-1; }
  .video-layer:nth-child(2) { animation-timeline: --section-2; }
  .video-layer:nth-child(3) { animation-timeline: --section-3; }
  .video-layer:nth-child(4) { animation-timeline: none; } /* last stays visible */
}

/* Optional fallback if view timelines are unsupported */
@supports not (animation-timeline: view()) {
  /* add a simple fade or leave the top video visible */
}

Use this pattern for other effects

Any property that is easy on the compositor works well here. Examples include clip-path inset wipes, opacity crossfades, transform-based masks, and reveal bars. The key is to tie the animation timeline to the section that conceptually owns the change.

Convert Figma designs into code with AI

Generate clean code using your components & design tokens
Try FusionGet a demo

Generate high quality code that uses your components & design tokens.

Try it nowGet a demo
Continue Reading
Visual Development10 MIN
Create a full-stack app with AI
WRITTEN BYAlice Moore
October 9, 2025
AI9 MIN
Build a buttery scroll reveal like WAC with GSAP
WRITTEN BYSteve Sewell
October 7, 2025
AI6 MIN
Build buttery smooth carousels with pure CSS like Nike
WRITTEN BYSteve Sewell
October 3, 2025