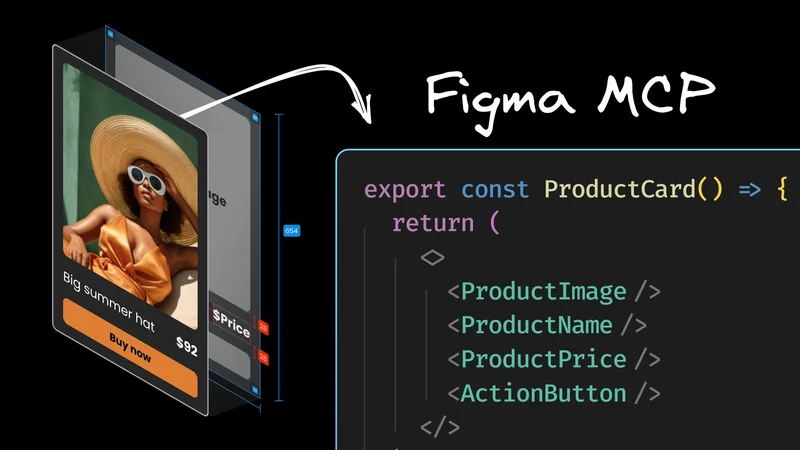
Design to Code with the Figma MCP Server
Updated November 18, 2025.
Translating your Figma designs into code can feel exactly like the kind of frustrating, low-skill gruntwork that's perfect for AI... except that most of us have also watched AI butcher hopeful screenshots into unresponsive spaghetti.
What if the AI could see the actual structure behind your design instead of guessing from flat images?
In this guide, we’ll walk through a full workflow for design-to-code with the Figma Dev Mode MCP server. You’ll learn how to set up the server, connect your AI tooling, and generate usable code that aligns with your design system while saving time on manual handoff.
The Figma MCP server is a local service that exposes the structured contents of your Figma file through the Model Context Protocol (MCP), an open standard that allows AI tools to communicate directly with software instead of interpreting screenshots or exported assets.
Once the server is running, an AI agent can request live design data from your selected layer. This includes hierarchy, layout rules, text styles, component properties, and image references. Because this information reflects the way your design is actually constructed, it forms a more reliable foundation for generating code.
The Figma MCP server gives AI assistants a clear understanding of how a design is built.
Instead of guessing from rendered pixels, the agent receives real structural information from your file. This often produces cleaner code, better alignment with your existing components, and fewer manual corrections.

The MCP server is a central part of modern Figma design-to-code workflows because it gives AI tools a consistent and accurate view of your layout structure.
The Figma server allows an MCP client to read the selected layer in your file and access the details that matter for implementation.
The Figma server allows an MCP client (like Cursor or Claude Code) to read the selected layer and access the details that matter for implementation.
These include the node tree, variant information, layout constraints, design tokens, and asset references, which screenshot-based tools cannot capture.
Because the data is structured and consistent, it supports workflows like design-to-code, automated documentation, and AI-assisted development inside IDEs that support MCP.
Okay, down to business. Feel free to follow along. We're going to:
- Grab a design
- Enable the Figma MCP server
- Get the MCP server running in Cursor (or your client of choice)
- Set up a quick target repo
- Walk through an example design to code flow
If you've already got some Figma designs handy, great! It's more rewarding to see your own designs come to life. Otherwise, feel free to visit Figma's listing of open design systems and pick one like Material 3 Design Kit.
I'll be using this screen from the Material 3 Design Kit for my test:

First, be aware that Figma’s official server only works a paid plan that includes Dev Mode. If you’d rather use a free community server, I’ve used this one a bunch and had good luck with it.
Once you have a Figma plan, you can head over to preferences in any design file and check “Enable Dev Mode MCP Server”

The server should now be running at http://127.0.0.1:3845/sse. Depending on your operating system and firewall settings, the port may differ.
Now we can hop into an MCP client of your choosing.
For this tutorial, I'll be using Cursor, but Claude Code, Windsurf, Zed, or any IDE tooling with MCP support is totally fine. (Here’s a breakdown of the differences.) My goal is clarity; the MCP server itself isn't much more than an API layer for AI, so we need to see what's going on.
Cursor has an online directory from which you can install Figma’s MCP server.

Clicking “Add Figma to Cursor” will open up Cursor with an install dialog.

After clicking “Install,” if the server is working properly, you should see a green dot and the enabled tools in your Cursor Settings.

If you see a red dot, try toggling the server off and on again, making sure that you have the Figma Desktop app open in the background with the MCP server enabled.
Now, when you prompt Cursor in Agent mode, you'll see the AI make tool calls to the MCP server when you say things like, "Use the Figma MCP to..."
Next, we'll need somewhere to actually put the resulting code. When using this workflow, you're not always going to be starting from scratch; good design to code means implementing Figma designs in existing repos.
For our purposes today, I'll just spin up a Next.js starter template, with npx create-next-app@latest. Feel free to try this on a branch of one of your existing repos to truly stress test the workflow.
Okay, we should be all set. Select the relevant layer in Figma (note that you can only select one) and then switch over to Cursor. The server can only see what you have selected.
In this case, I’ll prompt Cursor with: “Could you replace my homepage with this Figma component? It should be a chat app.”
In total, the AI wrote 215 lines of React and 350 lines of CSS. The component mostly looks like the design, though it’s not pixel perfect, it’s missing some of the data in the original, and none of the buttons work. The generation took around 4 minutes with Claude 4.
I can use a few more prompts to add functionality, clean up the code, and then go in there by hand to finesse some of the CSS, which AI never seems to get as clean as I like (too many magic numbers). But it definitely saves me time over setting this all up by hand.
In the demo above, I kept the instructions simple on purpose. In real projects, you can get much better results from the Figma MCP server by treating it like a junior engineer who needs context, not magic.
The MCP server makes the structure of the selected Figma layer available, but it has no knowledge of your codebase, naming conventions, or component usage patterns. That is the part developers can shape. The more guidance you provide inside your project, the more consistent the AI becomes.
Here are a few reliable ways to improve results without touching the Figma file itself:
- Create small (even AI-generated) markdown files the agent can reference. Think of these as onboarding documents. Add them to your repo and point the agent there each time you convert a design.
- Add component hints inside your codebase. Include a short README in each component folder that shows how it's intended to be used. Even 2–3 examples can anchor the model.
- Annotate tricky requirements directly in your prompt. If a design includes behavior that is hard to infer from the Figma node tree, such as "this card needs a loading state," call it out.
- Give the agent the right starting point. When using MCP, the agent can only see the selected Figma layer. So, be explicit about which file or component it should modify, remind it where to place new components, and link any related code it should reference.
Ultimately, since the Figma MCP server is just a connection layer between the Figma API and Cursor's agent, better results depend on learning how to get the most out of Cursor. For that, we have a whole bunch of best practices and setup tips, if you're interested.
Remember, the goal isn’t to replace yourself; it’s just to be able to focus on the more interesting parts of the job.
The most powerful way to guide the MCP workflow is through Figma’s Code Connect feature.
It lets you map a design component in Figma to the real code component in your repository. Once mapped, those details flow through Dev Mode and into the MCP server responses, which tells your AI client exactly which component to use.
For developers, the CLI is usually the best place to start. It allows you to define component mappings, property mappings, and example usage right in your codebase. Designers can then view and rely on those mappings inside Figma’s Dev Mode UI.
With Code Connect plus a little written context, the MCP server gets both the design structure and your project rules.
These tools make the workflow smoother, but they do not remove the bigger constraints of the MCP architecture itself.
Figma MCP offers a cool workflow. As a more senior developer, offloading the boring work to configurable AI is really fun.
But when you move from experimentation to building production-ready software for a team, I still see a lot of fundamental limitations:
- Even with Code Connect providing instructions like, “use our
Buttoncomponent,” the AI’s process is still a one-way street. It has no visibility into the final, rendered output of its own code, unable to see if a global style from another file is overriding its work or if a component renders incorrectly on the page. - Design systems are mapped, but not dynamically enforced. Although Code Connect provides component advice, the AI can still “creatively” generate one-off styles for margins or colors when it encounters something not explicitly in the map. It lacks the live, structural understanding of your codebase required to guarantee consistency.
- The entire process—from mapping components in Code Connect to configuring the IDE and merging code—is highly technical. This not only excludes designers and PMs from the process, but it also means the developer bears the full burden of setup, maintenance, and visually QA'ing every AI output to catch the inevitable discrepancies.
These limitations create a workflow that, while definitely an improvement over screenshots, still feels like a fragile translation layer between Figma and your codebase. It requires constant developer oversight, struggles with bespoke systems, and doesn't solve for team-wide collaboration.
This is the gap that a more integrated visual development platform is designed to fill. Let’s take a look.
The solution to these limitations is to give the AI eyes to see the rendered output, and to strategically enforce your components and design system.
This is the gap that Builder.io’s Fusion is designed to fill. It moves beyond static mapping to create a live, visually-aware development environment where the AI edits your existing repository by observing your application.
Instead of working from disconnected instructions, Fusion's AI agent operates on a live, interactive preview of your application. This is made possible by instrumenting your code to create a precise, two-way map between the rendered UI and the source files.
Under the hood, every element in the visual canvas is enriched with attributes that point to its exact origin in the codebase—the specific file and line of code that generated it. For example:
The AI doesn't just see a button in the DOM; it sees a button that it knows corresponds to the component in src/components/Button.tsx on line 12. Plus, it can access all rendered CSS, so it knows the button's exact visual state at all times.
This architecture fundamentally changes what’s possible.
The problem: An AI working from instructions alone often regenerates large blocks of code to apply a change, resulting in massive, multi-thousand-line diffs that are difficult and time-consuming to review.
Plus, if it can't see the final rendered output, it can’t debug visual discrepancies without you getting in there with a good, “Nuh uhh, that’s not what I see.”
The Fusion solution: With a live visual map, the AI performs a differential analysis, comparing the design intent to the actual rendered pixels.
This keeps AI-generated diffs small and focused. The agent edits only the exact lines of code necessary because it can pinpoint the source of a visual element and see the direct impact of its changes.
Less automated gaslighting, more time to watch your shows.
Example: Imagine you're fixing a dark mode bug. You tell the agent, "This text is too dark and hard to read." A traditional AI may argue with you for a while about how the text is nearly pure white. The Fusion agent, however, can see the problem:
"It looks like the rendered CSS color for this text isrgb(50, 50, 50). However, the design token applied in the code is--color-text-primary, which should resolve torgb(230, 230, 230). I can see the style is being overridden by the global CSS file atapp/do-not-use. I will fix the selectors’ specificities to ensure the correct color is applied."
This is only possible because the AI isn't just following instructions; it's observing, diagnosing, and correcting your live, running application.
The problem: Mapping alone treats your design system as a suggestion. Nothing forces the AI to follow the rules, or just not hallucinate.
The Fusion solution: Fusion indexes your entire component library and design system, turning them into hard constraints that the AI must follow.
Example: A Product Manager asks to "add a three-column feature section with icons above the footer."
An AI working only from instructions might generate new divs with inline styles. The Fusion agent, having indexed your codebase, understands your system's structure. It will instead generate code that correctly uses your existing components:
The AI reuses your components because it's the only path available within the established guardrails, ensuring every change is consistent and maintainable.
The problem: In case you haven't had the distinct pleasure of experiencing a typical design handoff to engineering, let me take you on a brief tour:

Any tool that can speed this up is a godsend. But if it’s not usable by the entire team, due to the technical complexity of MCP, IDEs, and a whole bunch of other developer acronyms, then devs stay the bottleneck for visual changes. We’re back to the endless loop of “oops, the developer found an edge case and we have to redesign.”
The solution: Fusion breaks down these silos by providing a shared visual canvas that’s accessible to everyone, thanks to it being both a VS Code extension for developers and a web app for everyone else.
This means your entire team can interact with your codebase and make PRs in a visual, intuitive way, without ever touching a line of code.
Example: Your Product Manager gets inspired by a feature on a competitor's site. Instead of writing a ticket, they can just use the Builder Chrome extension and the Fusion web app to quickly have AI make the feature using your existing components and styles.
The PM can iterate as much as they’d like and then create a clean PR for the devs to review, with imports from existing components:
Devs still own the codebase and all its particularities. It’s just now open for more contributions, as if you’ve open-sourced your codebase to your org.
We're really excited about with this workflow because it lets designers, product managers, and marketers all get stuff done in spaces usually reserved for devs. As we've been dogfooding internally, we've seen boards of Jira papercut tickets just kinda... vanish.
I’m much more excited about all these advanced repo features above, but it’s also nice to know that our design-to-code agent, as a specialist, also handles extrapolating on basic instructions really well.
Running the same simple “design-from-scratch” prompt as the Figma MCP demo with Builder results in a more functional, pixel-perfect starting place:
Using an Figma’s MCP server to convert your designs to code is a nice upgrade over parsing design screenshots with AI. Its data-rich approach gets you much farther along, much faster than developer effort alone.
Then, if you end up needing to convert designs to code in a more sustainable and accurate way, especially with a team, check out the toolkit we've made at Builder.
Happy design engineering!