9/18 | Validate feature ideas earlier with AI-driven prototypes

What are best AI tools? Take the State of AI survey

Builder.io
Builder.io
Contact sales
‹ Back to blog

AI

Create a 3d scrolling animation with GSAP and Veo 3

October 1, 2025

Written By Steve Sewell

How does the Adaline website make this awesome 3D zooming effect when I scroll? It is using a funny trick that Apple uses all the time too.

Let me show you how I recreated this effect. We’ll cover the easy way (using AI to assist) and how to implement it from scratch in code as well. Then how to make infinite variations of it with Builder.io and Veo 3:

First we need a starting point

Going into 2026, I do not think you should waste time coding this scaffolding by hand. You are welcome to do it if you like, but if you want an easier way you can do like I did.

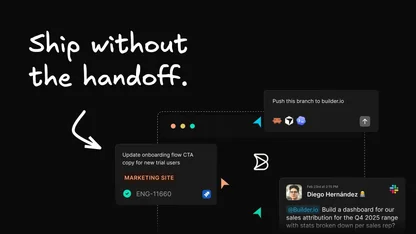
I used the Builder.io Chrome extension to pull in the layout and design for the production site to be my starting point:

The dirty secret of these types of animations is they use use a sequence of images.

image.png

The effect is powered by GSAP plus ScrollTrigger and a numbered sequence that we render to a canvas. Looking at their site, they have a bunch of image urls numbered -001 to 280, so heres the prompt I used:

use the gsap to create a zooming out effect on scroll. 
use this sequence of jpegs as your keyframes. 
the filenames end in numeric sequence -- follow them. 
this should be scroll triggered when user scrolls down the page, until the animation completes, then normal scrolling resumes.

here are the keyframe jpegs from last to first. use the final three digit number to order them:
https://www.adaline.ai/sequence/16x9_281/high/graded_4K_100_gm_85_1440_3-001.jpg
...
https://www.adaline.ai/sequence/16x9_281/high/graded_4K_100_gm_85_1440_3-280.jpg

I fired that off and let the agent do its thing. The first pass got close but needed some refinement. Remember: just like working with a human, give feedback and iterate until things are the way you want.

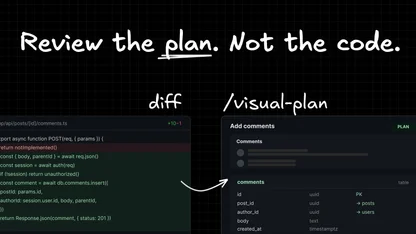
If using Builder.io, you can use design mode for precision control too:

Once you get things looking good, we can move on to customizing

Before I explain the code behind how this works, lets fill this with some custom content using Veo 3.

In the Gemini app choose “Create videos with Veo”. I find that Veo does better when I give it a visual reference, basically a storyboard.

Here is the image I fed Veo:

image.png

And the prompt:

here is a photo of a timeline of another video. 
it shows a landscape and then pans out (like the camera is moving backwards) until eventually you end up in a room with the doors closing in front of you. 
the doors and room were behind you but the camera backs up until they are in front. those images in the screenshot are in order

please recreate a video like this - a landscape that zooms out, but make it a totally different landscape. 
make it a dark cyberpunk city street with neon lights. 
the camera pans out (like the camera is backing up) until you end up in a room with doors closing in front of you

Sometimes Veo gets confused and tries to recreate the storyboard literally. That is not what I want. Like everything with AI, iterate and give feedback.

After a little bit of iteration, I’m happy with what I got:

You’ll need to convert this to a url next. To do that I downloaded the video, then upload it to builder.io/upload, and grab the URL. Any other hosting service works here too.

To replace the current GSAP slides with a video, you need to make just one tweak.

We’ll need the site to extract the video into frames. In Builder.io you can just prompt it like

Please replace the current images with frames from this video instead [paste video url]
Extract the frames in advance and then use them for the same scroll animation we have currently

After a little iteration we have our new animation. Cool!

Now, let’s explain the code. Here is the full shape first, with placeholder comments so you can see the structure.

// ImageSequenceZoom.tsx
import { useEffect, useRef } from "react";
import gsap from "gsap";
import { ScrollTrigger } from "gsap/ScrollTrigger";

gsap.registerPlugin(ScrollTrigger);

const imageUrls = [
  "/frame-001.jpg",
  // ... up to frame-NNN.jpg
];

export default function ImageSequenceZoom() {
  const containerRef = useRef<HTMLDivElement | null>(null);
  const canvasRef = useRef<HTMLCanvasElement | null>(null);
  const frameRef = useRef({ frame: 0 });
  const imagesRef = useRef<HTMLImageElement[]>([]);

  useEffect(() => {
    // 1) preload images
    // 2) drawFrame helper
    // 3) create GSAP timeline tied to scroll
    // 4) resize handling
  }, []);

  return (
    <div ref={containerRef} className="h-[300vh] relative">
      <canvas ref={canvasRef} className="sticky top-0 w-full h-screen bg-black" />
    </div>
  );
}

First we need a sticky canvas in a big div so we can continue to scroll while our canvas stays “stuck” the top until our animation is done.

<div className="h-[300vh] relative">
  <canvas className="sticky top-0 w-full h-screen" />
</div>

We load every frame up front so scrubbing is smooth. Failed frames are ignored.

// inside useEffect
const loadImages = async () => {
  const images = await Promise.all(
    imageUrls.map(
      url =>
        new Promise<HTMLImageElement | null>(resolve => {
          const img = new Image();
          img.onload = () => resolve(img);
          img.onerror = () => resolve(null);
          img.src = url;
        }),
  ));
  imagesRef.current = images.filter(Boolean) as HTMLImageElement[];
};

Call it and draw the first frame if available.

await loadImages();
if (imagesRef.current.length) drawFrame(0);

We set the canvas size to device pixels and cover the canvas while preserving aspect ratio.

// still inside useEffect
const drawFrame = (i: number) => {
  const canvas = canvasRef.current;
  const img = imagesRef.current[i];
  if (!canvas || !img) return;

  const ctx = canvas.getContext("2d");
  if (!ctx) return;

  const rect = canvas.getBoundingClientRect();
  const dpr = window.devicePixelRatio || 1;

  canvas.width = Math.round(rect.width * dpr);
  canvas.height = Math.round(rect.height * dpr);
  ctx.setTransform(dpr, 0, 0, dpr, 0, 0);

  ctx.clearRect(0, 0, rect.width, rect.height);
  // Same aspect, so fill the canvas directly
  ctx.drawImage(img, 0, 0, rect.width, rect.height);
};

We animate a plain number on an object and redraw on every update. scrub: 1 ties it to scroll position.

import gsap from "gsap";

// ...

// after loadImages and first draw
const tl = gsap.timeline({
  scrollTrigger: {
    trigger: containerRef.current,
    start: "top top",
    end: "bottom bottom",
    scrub: 1,
    invalidateOnRefresh: true,
  },
});

tl.to(frameRef.current, {
  frame: Math.max(0, imagesRef.current.length - 1),
  ease: "none",
  onUpdate: () => {
    const i = Math.round(frameRef.current.frame);
    if (i >= 0 && i < imagesRef.current.length) drawFrame(i);
  },
});

To make sure we really nail this, heres some best practices to follow:

  • Place this lower on the page, not in the hero. You want time to preload the sequence so the first view is not a blank canvas that feels like a Flash era site that has to load first (yuck).
  • Do not scroll jack. Let native scroll drive the scrub. Listen to scroll. Do not override it.
  • Add a fallback for slower devices and small screens. Apple uses a static image for smaller screens and slower devices.
  • Optimize assets. Compress JPEG or AVIF, serve from a CDN, and cache aggressively.
  • Test on low end hardware. The scrubbing should stay smooth.

The parts are simple. A canvas, an image sequence, and scroll driven frames.

Or, make it easy on yourself, and try it out visually with Builder.io.

Generate clean code using your components & design tokens
Try FusionGet a demo

Share

Twitter / X
LinkedIn
Facebook
Share this blog
Copy icon
Twitter "X" icon
LinkedIn icon
Facebook icon

Visually edit your codebase with AI

Using simple prompts or Figma-like controls.

Try it nowGet a demo

Design to Code Automation

A pragmatic guide for engineering leaders and development teams

Access Now

Continue Reading
AI6 MIN
Faster UX Design with AI
October 1, 2025
AI7 MIN
Five things to try with the Supabase MCP server
September 30, 2025
AI11 MIN
What Is a Visual IDE?
September 29, 2025