

 Request a blueprint
 Go to developer docs
Integrate Announcement Bars
Enterprise plans

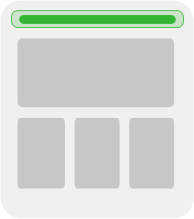
An announcement bar at the top of your site is a common pattern in Builder.
Model definition
A standard section model named announcement-bar is all you need. By default, you don't need any fields. Instead, use targeting to decide which announcement bar shows where.
Example Code
Notice that RenderBuilderContent is a component you'd make. In this example, RenderBuilderContent is in builder.tsx:

Want the latest and greatest of Remix with Builder? We recommend using Gen 2.
Paste the following code into a new file within the routes directory called $.tsx, making sure to replace YOUR_API_KEY with your Public API Key.
In your project, be sure that package.json has "type": "commonjs".
In remix.config.cjs (update the file extension to .cjs if needed), and update two parts:
- Change
export defaulttomodule.exports. - Add
serverModuleFormat: "cjs".
In your project, be sure that package.json has "type": "commonjs".
In remix.config.cjs (update the file extension to .cjs if needed), and update two parts:
- Change
export defaulttomodule.exports. - Add
serverModuleFormat: "cjs".
Want the latest and greatest of Remix with Builder? We recommend using Gen 2.
In your project, be sure that package.json has "type": "commonjs".
In remix.config.cjs (update the file extension to .cjs if needed), and update two parts:
- Change
export defaulttomodule.exports. - Add
serverModuleFormat: "cjs".
+page.server.js, define load() function that fetches the content for the announcement-bar section:+page.svelte page.Create a page with the following contents. Make sure to replace YOUR_API_KEY with your Public API Key:
Import fetchOneEntry, Content, and isPreviewing from the Vue SDK.
Using fetchOneEntry(), specify the announcement-bar model, your Public API Key, and the announcement-bar content.
Paste the following code into the appropriate .tsx file within the src/pages directory:
The following App.js code is an example of integrating an announcement-bar model. Make sure to replace YOUR_API_KEY with your Public API Key:
Fetch the data with a resolver:
In announcement-bar.component.ts, subscribe to the route's resolved data from the resolver, in order to render it in the template.
Create a page with the following contents:

Tip: When using the HTML API to serve content you need to integrate Builder previewing into your site so that previews are accurate. For detailed instructions, visit Previewing content on your site in the HTML API document.
For more flexibilty when working with an integrated Swift app, we recommend using Appetize.io. Find detailed instructions in the section Using your app with Builder in Integrating Pages.
Add the following code in any .liquid file that you would like this Builder section to appear on.
Learn more about Builder's Shopify code generation options and using Builder.io with Shopify for developers.
For more detail on creating an Announcement Bar in Builder, refer to Integrating Sections.