Made in Builder.io

Upcoming webinar with Figma: Design to Code in 80% Less Time

Announcing Visual Copilot - Figma to production in half the time

Builder.io logo
Talk to Us
Platform
Developers
Talk to Us

Blog

Home

Resources

Blog

Forum

Github

Login

Signup

×

Visual CMS

Drag-and-drop visual editor and headless CMS for any tech stack

Theme Studio for Shopify

Build and optimize your Shopify-hosted storefront, no coding required

Resources

Blog

Get StartedLogin

‹ Back to blog

Migration

Moving from Wordpress to Builder.io

August 22, 2023

Written By Gustavo Garcia

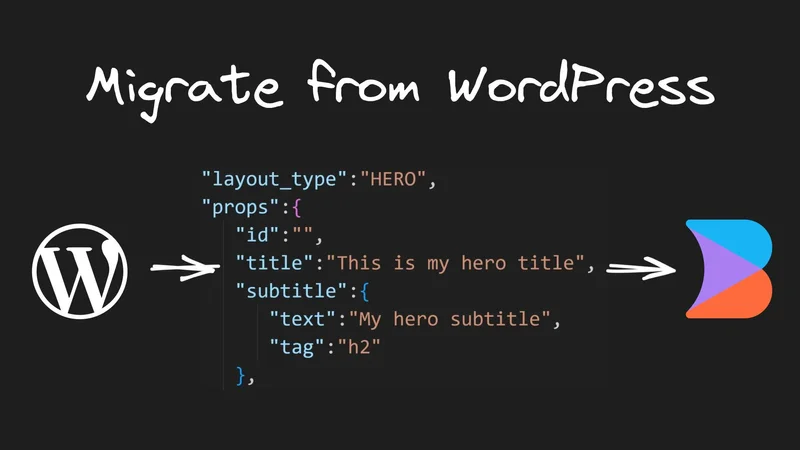
Moving content from your existing CMS can be much easier than you think. Already use a CMS like Wordpress? Do you have tools to export your content to a defined structure like JSON or other? If so, you have a pretty easy path to move your content to Builder.

Export your content

This section shows you how to migrate your content to Builder.io.

Export your content on a defined structure you can work with, as an example JSON format. Make sure you have your content well-defined in block structures like this example:
<div style="padding-top: 8px" classname="title">...</div>
This example would be parsed to:
{"tag": "div", "classname": "title", "style": {"padding-top": "8px"}, "children": ...}
Create some custom components in code that translates to your components from your CMS. For example, let's say we have a Hero Component that exists in your current CMS and is exported:
{
   "layout_type":"HERO",
   "props":{
      "id":"",
      "title":"This is my hero title",
      "subtitle":{
         "text":"My hero subtitle with a cool slogan",
         "tag":"h2"
      },
      "media":{
         "type":"image",
         "image":{
            "ID":11029,
            "id":11029,
            "title":"What is the universe?",
            "filename":"sample-file.svg",
            "url":"https://cool-wordpress/wp-includes/images/media/default.svg",
            "alt":"What is the universe?",
            "description":"What is the universe?",
            "caption":"What is the universe?",
            "name":"hero-v1",
            "mime_type":"image/svg+xml",
            "type":"image",
            "subtype":"svg+xml",
            "icon":"https://cool-wordpress/wp-includes/images/media/default.png",
            "width":704,
            "height":528,
            "sizes":{
               "thumbnail":"https://cool-wordpress/wp-includes/images/media/default-v3.svg",
               "thumbnail-width":"150",
               "thumbnail-height":"150",
               "medium":"https://cool-wordpress/wp-includes/images/media/default-v3.svg",
               "medium-width":"300",
               "medium-height":"300"
            }
         }
      },
      "background":"custom",
      "backgroundColor":"#123833",
      "colorModifier":"white",
      "size":"s",
      "hasButton":true,
      "button":{
         "label":"Click here",
         "action":{
            "type":"link",
            "value":"/call-to-action"
         }
      }
   }
}
This would turn into a custom component in your code such as:
import React from 'react'
import MyCustomButton from './components/MyCustomButton'

// defined props like title, subTitle, hasButton, buttonLink
export function Hero({
  title, subTitle, hasButton, buttonLink
  }) {
  return (
    <div>
      <h1>{title || 'Default hero title'}</h1>
      <h3>{subTitle || 'Default hero subtitle'}</h3>
      {
        hasButton && (
          <MyCustomButton link={buttonLink} />
        )
      }
    </div>
  )
}
Register your created custom components in Builder.io so you can use them within the Visual Editor:
import { Builder } from '@builder.io/react';
import { Hero } from './Hero'

Builder.registerComponent(Hero, {
  name: 'Hero',
  inputs: [
    {
      name: 'title',
      type: 'text',
      required: true,
    },
    {
      name: 'subtitle',
      type: 'text',
    },
    {
      name: 'hasButton',
      type: 'boolean',
    },
    {
      name: 'buttonLink',
      type: 'text',
    },
  ],
})

Now that you have your content exported and your custom components ready, it's time to get that content into Builder.io so you can edit and publish. Below we have written some step-by-step instructions on how to create your migration script.

Your migration script should:

  • Read your content from your exported files (in this example JSON files) looking for blocks and content of interest, which will be now parsed to your custom components:
const contentJson = require('./content.json')

const MODEL_NAME = 'blog-page'

async function main() {
  console.log('starting script...', contentJson.title)
  const blocks = <any>[]

  contentJson?.body?.map((layoutItem: any) => {
    let options: any = {
      category: layoutItem.layout_type,
      title: layoutItem.props.title?.text,
      subtitle: layoutItem.props.subtitle?.text,
    }

    if (layoutItem.layout_type === 'Hero') {
      options = {
        ...options,
        type: layoutItem.props.type,
        image: layoutItem.props.image,
        content: layoutItem.props.content,
        hasButton: layoutItem.props.hasButton,
        button: layoutItem.props.button
      }
    } else if (layoutItem.layout_type === 'Text') {
      // ... if you have a custom component for text blocks
      options = {
        ...options,
        content: layoutItem.props.content,
      }
    } 
    // ... continue to identify your blocks of interest
    }

    // push your components to your blocks array to be rendered on the model layout
    blocks.push({
      "@type": "@builder.io/sdk:Element",
      "@version": 2,
      component: {
        "name": layoutItem.layoutType,
        options,
      }
    })
  })

As in the above example, when you find a block of interest, identify the custom component that best suits that block and add the custom component with its options to the blocks array to be rendered on your model layout — in this case blog-page.

Finally, write your content to Builder.io using the Write API so you can edit and publish from the editor:

async function postData(body: any) {
  const res = await axios({
    method: 'post',
    url: `https://builder.io/api/v1/write/${MODEL_NAME}`,
    headers: {
      'Authorization': 'Your private space key goes here',
      'Content-Type': 'application/json',
    },
    data: body,
  });

  return res;
}

// each time you iterate over a page,
// you can call the write API to create a new entry
// with the blocks identified

const res = await postData(
    {
      name:  contentJson.url.replaceAll('/', ''),
      query: [
        {
          "property": "urlPath",
          "operator": "is", // can be `startsWith` to match any urls that starts with value
          "value": contentJson.url // must start with /
        }
      ],
      data: {
        title: contentJson.title,
        url: contentJson.url,
        metaTags: contentJson.metaTags,
        blocks: blocks,
      }
    }
  )

So the final migration script on this example should be like this:

const axios = require('axios');
const contentJson = require('./content.json')


async function postData(body: any) {
  const res = await axios({
    method: 'post',
    url: `https://builder.io/api/v1/write/${MODEL_NAME}`,
    headers: {
      'Authorization': 'Your private space key goes here',
      'Content-Type': 'application/json',
    },
    data: body,
  });

  return res;
}


const MODEL_NAME = 'blog-page'

async function main() {
  console.log('starting...', contentJson.title)
  const blocks = <any>[]

  contentJson?.body?.map((layoutItem: any) => {
    let options: any = {
      category: layoutItem.layout_type,
      title: layoutItem.props.title?.text,
      subtitle: layoutItem.props.subtitle?.text,
    }

    if (layoutItem.layout_type === 'Hero') {
      options = {
        ...options,
        type: layoutItem.props.type,
        image: layoutItem.props.image,
        content: layoutItem.props.content,
        hasButton: layoutItem.props.hasButton,
        button: layoutItem.props.button
      }
    } else if (layoutItem.layout_type === 'Text') {
      // ... if you have a custom component for text blocks
      options = {
        ...options,
        content: layoutItem.props.content,
      }
    } 
    // ... continue to identify your blocks of interest
    }

    // push your components to your blocks array to be rendered on the model layout
    blocks.push({
      "@type": "@builder.io/sdk:Element",
      "@version": 2,
      component: {
        "name": layoutItem.layoutType,
        options,
      }
    })
  })
    

  const res = await postData(
    {
      name:  contentJson.url.replaceAll('/', ''),
      query: [
        {
          "property": "urlPath",
          "operator": "is", // can be `startsWith` to match any urls that starts with value
          "value": contentJson.url // must start with /
        }
      ],
      data: {
        title: contentJson.title,
        url: contentJson.url,
        metaTags: contentJson.metaTags,
        blocks: blocks,
      }
    }
  )
  console.log('new entry added', res.status, res.statusText)
}


main().catch(err => {
  console.log(err)
})

This article showed how to migrate blog pages exported from Wordpress as JSON format files. Even so, you could use this same process to migrate any content to Builder.io exported from the most famous and used of CMSs on the market.

Migrating content from your existing CMS to Builder.io can be straightforward and fast — just make sure to export your content in a way that you can read it while keeping your components as well-defined as possible. This will help a lot in the migration process. Using these techniques, you can smoothly migrate hundreds or even thousands of pages as many of our customers do!

Introducing Visual Copilot: convert Figma designs to code using your existing components in a single click.

Try Visual Copilot

Share

Twitter
LinkedIn
Facebook
Hand written text that says "A drag and drop headless CMS?"

Introducing Visual Copilot:

A new AI model to turn Figma designs to high quality code using your components.

Try Visual Copilot
Newsletter

Like our content?

Join Our Newsletter

Continue Reading
Company News3 MIN
Builder.io closes $20 million in funding led by M12, Microsoft’s Venture Fund
WRITTEN BYSteve Sewell
April 24, 2024
AI9 MIN
How to Build AI Products That Don’t Flop
WRITTEN BYSteve Sewell
April 18, 2024
Web Development13 MIN
Convert Figma to Code with AI
WRITTEN BYVishwas Gopinath
April 18, 2024