

Section 1
The opportunity in automating design to code
"If you are in the middle of evaluating AI strategies to boost developer productivity for your organization, you are not alone. I haven't spoken to another CTO who isn't knee deep in the same search for the right AI strategy."
– Steve Sewell, Co-founder & CEO, Builder.io
The universal mandate for better developer productivity
In preparing this guide, we conducted video research interviews with engineering leaders from a wide variety of industries—leaders of development teams building both web and mobile applications. Almost universally, all the engineering leaders we've interviewed:

Have a mandate to explore AI for increasing developer productivity and happiness

Are trying to separate hype from meaningful results among an explosion of new offerings

Are struggling to establish a framework to measure the real impact and ROI of AI tooling


In short, everyone wants to know:
Can AI tools help my developers? Which ones? And how do I evaluate and track the impact?


This guide has a simple thesis: One of the biggest opportunities for development automation may be one you are entirely overlooking. If you are like most organizations, your engineers are spending 30-50% of feature development time doing UI implementation—the rather arduous task of translating completed Figma designs into application code.
As important as this step is to get right, it turns out this task is one that can now be almost entirely automated by AI with impressive results. In fact, as you’ll learn below, it's the exact type of problem where AI uniquely excels.
Who should read this guide
This guide has been written for the technical leaders of development and product teams that ship web and mobile applications. It's a guide for anyone who thinks about development team tools and workflows and looks for areas to reduce friction, increase velocity, and improve developer happiness.
If you've already begun to explore design to code automation, this guide will offer high-level guidance on how to set up a workflow tuned for optimal results. If you've yet to consider design to code automation, we'll cover why it's such a compelling use case for AI and how it can deliver real productivity gains without disrupting the way your teams already work today.
BEHIND THE GUIDE

RESEARCH
In preparing this guide, we conducted video research interviews with engineering leaders from a wide variety of industries.

RESEARCH
We surveyed teams to ask where the challenges are in design-to-code workflows and examined results of thousands of design conversions
Why Focus On Design to Code
REASON
1
Frontend markup is complicated and prone to error
The manual design to code handoff can be surprisingly complicated, and recreating a completed design in markup is not a strategic task and its not one most developers particularly enjoy. Worse, modern frontend development is complex and changes rapidly, which can be particularly taxing on already overloaded developer teams.
As one Senior Engineering Manager at John Deere noted, "There's less of a divide now between frontend developers, backend developers, and database developers. These large organizations tend to just have developers, and you're expected to do everything."
In the AI era, developers are looking to offload the annoying "toil" work to AI, freeing themselves up to focus on more challenging and engaging projects.
REASON
2
Your team is doing the same work twice
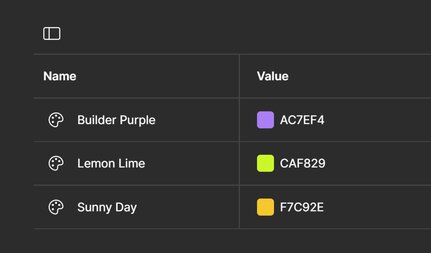
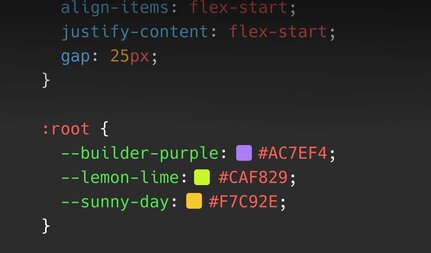
There's a particularly maddening part to design implementation: your team is actually doing the same work twice. First, design teams use visual controls in Figma to set exacting specifications for the UI—the color and opacity of a border, for example, or minimum and maximum with of a bounding box. Then developers must carefully review, interpret, and apply the detailed specifications from each Figma file so the same interface characteristics can be reimplemented in actual production code. It's tedious work that takes a keen eye to ensure everything is correct and nothing is overlooked.
REPEATING THE SAME WORK TWICE
1
First specs are set in Figma
First, design teams use visual controls to set exacting specifications for the UI – the color and opacity of a border, for example, or minimum and maximum width of a bounding box.
2
Then all over again in production code
Then developers must carefully review, interpret, and apply the detailed specifications from each Figma file so the same interface characteristics can be reimplemented in the actual production code.
"This is one of the best examples... where AI and generative AI, based on LLMs, can not replace but supercharge humans working on something, even if it's like heavily automated."
Research Participant
REASON
3
Going beyond DORA: new productivity goals and benchmarks
Traditional DORA metrics focus on automating developer infrastructure and answer questions like, "Once a developer commits code, can it be tested, compiled, and pushed to production without manual involvement?" AI is certainly being applied to help modernize devops tooling, even to the point of analyzing code to generate automated commit messages. But after years of tremendous investment in CI/CD, organizations are now "shifting left" as they realize developers tasks are burdened with the amount of boilerplate that has to happen **before** each commit.
Before developers can shape the behavior / interaction / or data flow of a UI component, they have to define the markup & code that renders the component visually and accurately. Traditionally this was just part of the job and developers would repeatedly adjust markup while repeatedly comparing the rendered output to the original design. Today—thanks to advancements in automation tooling and LLMs—the design to code process can finally be reliably automated.
“We previously spent six months just building the UI components for a prototype”
Research Participant
REASON
4
AI is uniquely suited to this task
Luckily, this design to code conversion is just the type of translation task where AI is particularly well suited. It's a domain to domain mapping problem where success is clear—the final coded implication should be a pixel-perfect match of the original design.
Before AI, there were some tools that would attempt code generation from design files. While these early tools could handle the straightforward mappings (like converting Figma rectangles to html divs with the same dimensions), the addition of AI reasoning marks the first time computers can recognize design intent, understanding when a group of elements actually represents a common UI pattern like a card, accordion, or navigation bar. This was a huge unlock for design to code automation, finally bringing the results up to the standards set by experienced developers .


Section 2
Calculating your potential productivity gains
We've spoken with dozens of enterprise software teams who automated this process and they estimate it produces around a 30% - 50% reduction in UI implementation time. This translates to a significant boost in your speed of feature delivery, particularly if your software is UI intensive and you are following the best practices outlined later in this guide.
50%
TIME SAVINGS
From the dozens of conversations we've had with enterprise software teams, we’ve found the average to be somewhere around a 30% - 50% reduction in UI implementation time
Guidance from teams we've interviewed
We've talked with teams from a wide variety of industries including medical, retail, finance, and consumer applications. Common projects include redesigning an existing web application, adding lots of content or/ landing pages to a retail site, creating custom components and experiences for ecommerce experiences, and building design systems that work across web and mobile applications.
While the industries tended to vary widely, the teams all expressed similar needs and objectives that lead them to exploring design to code automation.
Calculate your own potential savings
Simple components
Simple


Complex components
Complex


High-complexity components
Highly-complex


ESTIMATED
Developer Hours Saved
Watch your designs come to life in mere seconds, saving you hours of coding

Calculator Settings

Add or subtract components from your project scope:
Simple components
Simple


Complex components
Complex


High-complexity components
Highly-complex


Choose a baseline story (e.g., "implement basic sign up form") that takes 1 day, then estimate others relative to it.
1
Component Analysis
Break down each Figma design into atomic components while identifying reusable patterns and noting any custom behaviors or interactions that may affect development time.
2
Complexity Scoring Checklist
Evaluate the complexity of each component using a checklist such as
- Number of breakpoints required
- Interaction states (hover, active, disabled)
- Animation requirements
- Layout complexity (flex, grid, positioning)
- Custom styling requirements
- Browser compatibility needs
3
Reference Historical Data
Encourage the team to keep a log of similar components and their actual development time. This way you can update estimates based on team velocity and past performance. Be sure to document any unexpected challenges that affect timing.
4
Discuss as a team
Bring developers together in a team discussion where everyone can review designs together, fy technical challenges that might not be obvious, consider dependencies and integration requirements, and discuss testing and feedback loops.
A survey for your team
We've created a quick survey you can modify and send to your team as well as some topics you can use as guidance to meet and discuss the pilot project.


Section 3
Will it work with your tech stack?
Technical requirements check
The great thing about design to code automation is how compatible it is with a wide variety of technology stacks, development tools, and team workflows. It's likely design to code automation can be incorporated into your current projects and code base with very little disruption. Design to code automation makes no assumptions about the frameworks, tools, and technology stack your team has selected. Both designers and developers will be able to continue to use the tools they use today.
You can use the interactive flight check below to make sure a particular project is a good fit for design to code automation:
Guidance for getting design to code automation right
Across all the teams we've worked with, several make-or-break requirements have emerged that ultimately define if the initiative was successful. We've made that into a list of requirements that your team can live with daily and depend on for quality results.
1
Compatibility with existing tools
Developers will be too hesitant to abandon their well established tools and workflows to support an automation initiative. Automation must be minimally disruptive to provide value.
2
Design fidelity and setup matters
AI design to code automation must have access to structured, annotated design files like source files from Figma. Design screenshots or flattened PNG images are too lossy for quality results.
3
Code integration matters
While AI design to code can make an impressive demo in isolation, what's most important is how well the AI understands and incorporates context from your existing codebase.
4
Speed of iteration is important
For a tool used daily, how fast the AI can generate code in response to changes matters. Rather than regenerate the entire code block for each change today's best-in-class AI tools instead keep a tree representation of the component to create fast, surgical updates.
5
Best practices must be incorporated
Code that doesn't adhere to team standards won't pass code review. Beyond being able to replicate the design, AI code generation tools need deep context from your existing codebase and team standards.


Section 4
Generating quality code
"Looking at this, I think it looks great...if you asked me if a machine or human wrote this, I could not tell you."
Research Participant
A sample conversion
THE FIGMA TEMPLATE
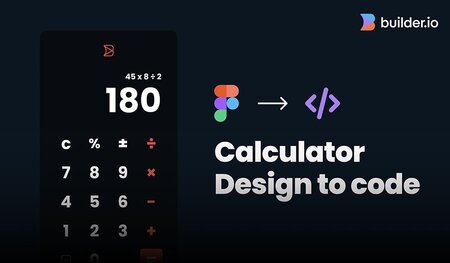
This sample file presents a simple calculator design using Figma's auto layout.
Step by step instructions to convert it to the component below are included.
LIVE PREVIEW


GENERATED CODE
import * as React from "react";
import { useState } from "react";

interface CalculatorState {
  currentValue: string;
  previousValue: number | null;
  operator: string | null;
  shouldResetInput: boolean;
}

export const StandardCalculator: React.FC = () => {
  const [state, setState] = useState<CalculatorState>({
    currentValue: "",
    previousValue: null,
    operator: null,
    shouldResetInput: false,
  });

  const appendNumber = (num: number) => {
    setState((prev) => ({
      ...prev,
      currentValue: prev.shouldResetInput
        ? num.toString()
        : prev.currentValue + num.toString(),
      shouldResetInput: false,
    }));
  };

  const appendDecimal = () => {
    if (!state.currentValue.includes(".")) {
      setState((prev) => ({
        ...prev,
        currentValue: prev.currentValue + ".",
      }));
    }
  };

  const clear = () => {
    setState({
      currentValue: "",
      previousValue: null,
      operator: null,
      shouldResetInput: false,
    });
  };

  const setOperation = (op: string) => {
    if (state.currentValue === "") return;

    if (state.previousValue !== null) {
      compute();
      return;
    }

    setState((prev) => ({
      ...prev,
      operator: op,
      previousValue: parseFloat(prev.currentValue),
      shouldResetInput: true,
    }));
  };

  const compute = () => {
    if (state.previousValue === null || state.operator === null) return;

    const prev = state.previousValue;
    const current = parseFloat(state.currentValue);
    let result = 0;

    switch (state.operator) {
      case "+":
        result = prev + current;
        break;
      case "-":
        result = prev - current;
        break;
      case "×":
        result = prev * current;
        break;
      case "÷":
        result = prev / current;
        break;
    }

    setState({
      currentValue: result.toString(),
      previousValue: null,
      operator: null,
      shouldResetInput: true,
    });
  };

  return (
    <div className="flex gap-4 justify-center items-center px-60 py-40 bg-red-500 max-w-[795px] max-md:px-5 max-md:py-24">
      <div className="flex flex-col items-center self-stretch p-9 my-auto rounded-2xl bg-zinc-800 min-w-[310px] shadow-[0px_7px_7px_rgba(0,0,0,0.25)] max-md:px-5">
        <div className="flex flex-col w-full text-center text-white max-w-[243px]">
          <img
            loading="lazy"
            src="https://cdn.builder.io/api/v1/image/assets/3c90d2cb44434d429d609c1fd6960263/4beed74f5cc060b4be806e2ea5010ccb0a5d5a105184dd0188d96c7a8356ab94?placeholderIfAbsent=true"
            className="object-contain self-center aspect-[0.87] w-[21px]"
            alt="Calculator icon"
          />
          <div className="flex gap-5 justify-center items-center mt-8 w-full">
            <div className="flex flex-col self-stretch my-auto text-xs w-[102px]">
              <div>
                <span className="font-medium text-[13px] text-white">
                  Standard
                </span>
              </div>
              <div className="flex self-center mt-1.5 w-7 bg-red-500 min-h-0.5" />
            </div>
            <div className="flex flex-col self-stretch my-auto text-sm font-medium whitespace-nowrap w-[102px]">
              <div>Scientific</div>
              <div className="flex self-center mt-1.5 w-7 min-h-0.5" />
            </div>
          </div>
        </div>
        <div className="flex flex-col items-center mt-9">
          <div className="flex flex-col justify-center w-60 max-w-full leading-none text-right text-white">
            <div className="text-lg">
              {state.previousValue !== null
                ? `${state.previousValue} ${state.operator} ${
                    state.currentValue || ""
                  }`
                : state.currentValue || ""}
            </div>
            <div className="mt-2 text-7xl font-medium max-md:text-4xl">
              {state.currentValue || "0"}
            </div>
          </div>
          <div className="mt-8">
            <div className="flex gap-3.5 items-center text-4xl leading-none text-center text-white whitespace-nowrap">
              <button
                className="self-stretch my-auto min-h-[51px] w-[51px]"
                onClick={() => clear()}
                aria-label="Clear"
              >
                c
              </button>
              <button
                className="self-stretch my-auto text-3xl min-h-[51px] w-[51px]"
                aria-label="Percentage"
              >
                %
              </button>
              <button
                className="self-stretch my-auto min-h-[51px] w-[51px]"
                aria-label="Plus/Minus"
              >
                ±
              </button>
              <button
                className="self-stretch my-auto text-red-500 min-h-[51px] w-[51px]"
                onClick={() => setOperation("÷")}
                aria-label="Divide"
              >
                ÷
              </button>
            </div>
            <div className="flex gap-3.5 items-center mt-4 text-4xl leading-none text-center text-white whitespace-nowrap">
              <button
                className="self-stretch my-auto min-h-[51px] w-[51px]"
                onClick={() => appendNumber(7)}
                aria-label="Seven"
              >
                7
              </button>
              <button
                className="self-stretch my-auto min-h-[51px] w-[51px]"
                onClick={() => appendNumber(8)}
                aria-label="Eight"
              >
                8
              </button>
              <button
                className="self-stretch my-auto min-h-[51px] w-[51px]"
                onClick={() => appendNumber(9)}
                aria-label="Nine"
              >
                9
              </button>
              <button
                className="self-stretch my-auto text-red-500 min-h-[51px] w-[51px]"
                onClick={() => setOperation("×")}
                aria-label="Multiply"
              >
                ×
              </button>
            </div>
            <div className="flex gap-3.5 items-center mt-4 text-4xl leading-none text-center text-white whitespace-nowrap">
              <button
                className="self-stretch my-auto min-h-[51px] w-[51px]"
                onClick={() => appendNumber(4)}
                aria-label="Four"
              >
                4
              </button>
              <button
                className="self-stretch my-auto min-h-[51px] w-[51px]"
                onClick={() => appendNumber(5)}
                aria-label="Five"
              >
                5
              </button>
              <button
                className="self-stretch my-auto min-h-[51px] w-[51px]"
                onClick={() => appendNumber(6)}
                aria-label="Six"
              >
                6
              </button>
              <button
                className="self-stretch my-auto text-red-500 min-h-[51px] w-[51px]"
                onClick={() => setOperation("-")}
                aria-label="Subtract"
              >
                -
              </button>
            </div>
            <div className="flex gap-3.5 items-center mt-4 text-4xl leading-none text-center text-white whitespace-nowrap">
              <button
                className="self-stretch my-auto min-h-[51px] w-[51px]"
                onClick={() => appendNumber(1)}
                aria-label="One"
              >
                1
              </button>
              <button
                className="self-stretch my-auto min-h-[51px] w-[51px]"
                onClick={() => appendNumber(2)}
                aria-label="Two"
              >
                2
              </button>
              <button
                className="self-stretch my-auto min-h-[51px] w-[51px]"
                onClick={() => appendNumber(3)}
                aria-label="Three"
              >
                3
              </button>
              <button
                className="self-stretch my-auto text-red-500 min-h-[51px] w-[51px]"
                onClick={() => setOperation("+")}
                aria-label="Add"
              >
                +
              </button>
            </div>
            <div className="flex gap-3.5 items-center mt-4">
              <div className="flex flex-col justify-center items-center self-stretch my-auto rounded-lg bg-zinc-800 h-[51px] min-h-[51px] w-[51px]">
                <img
                  loading="lazy"
                  src="https://cdn.builder.io/api/v1/image/assets/3c90d2cb44434d429d609c1fd6960263/84ad92fe8f8c6305d656aceaf6c00b5e05687d8603f840689767c9ae5b081397?placeholderIfAbsent=true"
                  className="object-contain aspect-square w-[27px]"
                  alt="Calculator function"
                />
              </div>
              <button
                className="self-stretch my-auto text-4xl leading-none text-center text-white whitespace-nowrap min-h-[51px] w-[51px]"
                onClick={() => appendNumber(0)}
                aria-label="Zero"
              >
                0
              </button>
              <button
                className="self-stretch my-auto text-4xl leading-none text-center text-white whitespace-nowrap min-h-[51px] w-[51px]"
                onClick={() => appendDecimal()}
                aria-label="Decimal point"
              >
                .
              </button>
              <button
                className="self-stretch my-auto text-4xl leading-none text-center text-white whitespace-nowrap bg-red-500 rounded-lg h-[51px] min-h-[51px] shadow-[0px_7px_7px_rgba(0,0,0,0.25)] w-[51px]"
                onClick={() => compute()}
                aria-label="Equals"
              >
                =
              </button>
            </div>
          </div>
        </div>
      </div>
    </div>
  );
};
To achieve great results, focus on the factors below:


REQUIREMENT ONE
Compatibility with existing tools
Automation must be minimally disruptive to achieve team adoption. Developers will be too hesitant to abandon their well established tools and workflows to support an automation initiative.

REQUIREMENT TWO
Design fidelity and setup matters
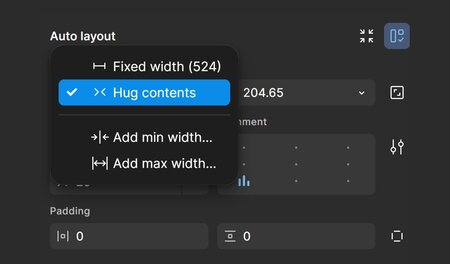
AI design to code automation must have access to structured, annotated design files like source files from Figma. Design screenshots or flattened PNG images are too lossy for quality results.

REQUIREMENT THREE
Speed of iteration is important
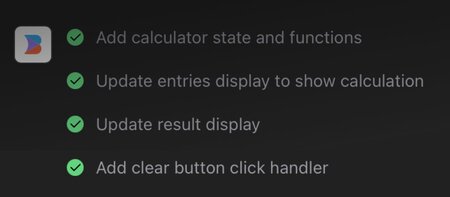
For a tool used daily, how fast the AI can generate code in response to changes matters, as the additional time AI spends thinking starts to add up. Many AI tools simply regenerate the entire code over and over—newer, smart AI codegen tools instead keep a tree representation of the component to create fast surgical updates.

REQUIREMENT FOUR
Best practices must be incorporated
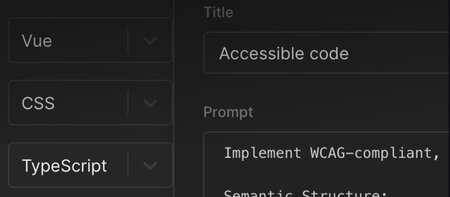
Code that doesn't adhere to team standards won't pass code review. Beyond being able to replicate the design, AI code generation tools need deep context from your existing codebase and team standards.
Rich context
You may have experienced how powerful AI code completion tools like Github Copilot can be—but only when fed the right context. Similarly AI design to code tools need to have a deep understanding of your design files, your code base, and your team's coding standards to produce results that you can reliably commit to your codebase. The conversion is only successful if it truly saves time—meaning the code must be maintainable and meet team standards.
Design fidelity
Important: Figma documents contain rich metadata that is entirely discarded when a Figma design is converted to a PNG, SVG, or other image format. An example: even the most powerful AI available cannot reconstruct how the designer set up autolayout and the intended minimum and maximum widths of a UI when starting from a static image. If you only take one thing from this guide, remember that any AI tooling for design to code automation has to natively understand the original Figma document to have enough data to perform the conversion accurately.
Code integration
Like any developer on the team, it's important for AI assistants to know when to create new component code and when to import and use existing components in your codebase.
Builder uses a concept called component mapping to create a direct relationship between the components created by your design team in Figma and components created by your developers in your codebase. For example, a Figma component called Data Table could be used in design files as a representation of the actual DataTable.tsx component in your codebase. With the mapping in place, the AI conversion will know to import the existing DataTable.tsx with all its functionality rather than try to generate a new data table component from scratch.
Your team can even write your own component mapping functions for extremely precise control over how properties, variants, and variables from Figma translate into properties and values that are passed to your components.
Team standards
Every development team has their own unique coding style, best practices, and project-specific requirements. These rules inform quite a few aspects of how code is written: coding standards, which libraries to use / avoid, accessibility requirements, etc. Code that doesn't meet these unique requirements will get rejected during code review—no matter what portions of it are manually crafted or automatically generated.
Using custom instructions, you can bake these preferences right into the AI's behavior.
Builder Develop provides a few custom instructions that you can use as a starting point. In the UI, you'll see the custom instructions broken into three categories: general guidance, match coding style, and guidelines for accessibility.
You can also use custom instructions to describe APIs, libraries, and data structures for your components to consume.
The website cursor.directory is a great source of inspiration for writing coding guidance for AI. Since custom instructions are provided in natural language, they should work across AI tooling.


Section 5
An overview of the workflow
DESIGN STAGE
Design Stage
TOOLS USED:

Figma
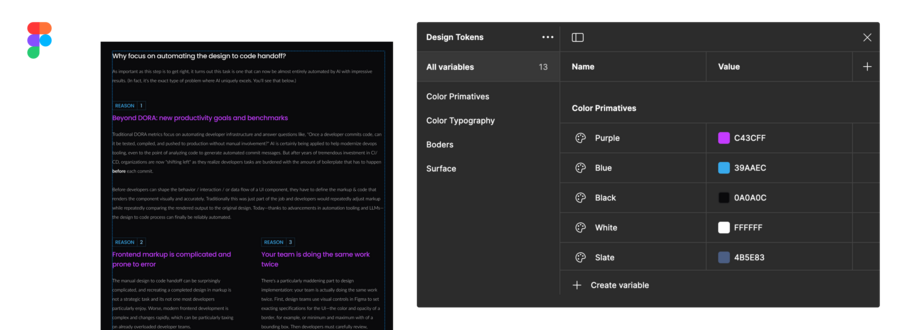
The designers in your organization can continue to use Figma—the most comprehensive and popular digital experience design tool available today. They'd continue to work with components, tokens, and variants just as they do today. Once the design is ready for handoff, artificial intelligence is then used to analyze the design decisions captured inside of Figma's preparatory format and translate them to production ready frontend code that the developers can incorporate into web and mobile applications.
The best tips we have for your design team are these: AI is specifically trained to recognize design intent and apply best practices. But just like a traditional design handoff, a few simple guidelines can improve how accurate the conversion is.
- Take advantage of Figma's auto layout features where possible. Auto layout aids in encouraging the correct behavior of the AI model, particularly in complex designs. It's also a great way to communicate how you expect the design to behave in responsive scenarios.
- Work together with your development team to map Figma components to the real components in your codebase. When you incorporate a mapped component into your design, AI will know to use existing code rather than generate new code.
- Use descriptive layer and component naming. A component named "toast notification" can help AI infer the intent of your design.
- Explicitly define images. Do this by selecting any elements meant to be rendered out as images and defining their export settings—which the AI will notice and apply.
- Similarly, group layers that constitute background elements together.
- As much as possible, stay tidy as you layout elements and avoid unnecessary overlapping of containers. Keep text bounding boxes snug to the text within them.
- Finally, consider scale and design elements to closely match real-world dimensions for accurate and practical results.
PROTOTYPE STAGE
Prototype stage
TOOLS USED:

Figma

Builder plugin for Figma & Builder Visual Copilot
AI assisted prototyping and collaboration
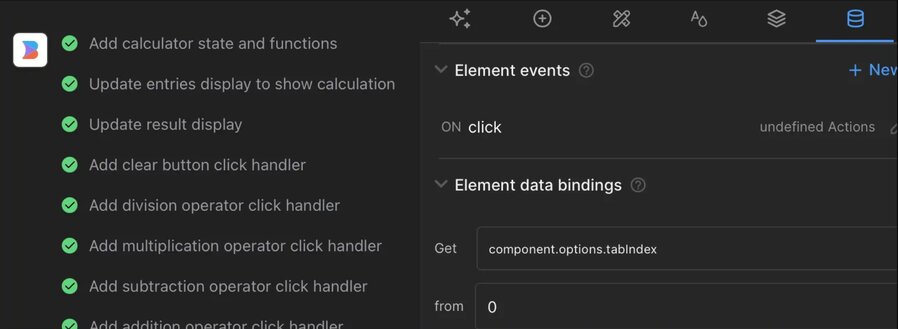
There's always been an inherent tension in static design assets used as the specifications for interactive UI components. Even with dev mode, Figma files can present developers quite a bit of ambiguity: "How long should this toast remain on the screen? What if the text is longer? Does it animate? Do multiple toasts stack?" With web native prototyping, designers better express their complete vision and developers are saved from open ended questions and frustrating back and forth revisions. Prototyping happens on a visual canvas that shows exactly how designs will appear in web-native HTML across both desktop and mobile. Designers can perfect visual aspects like colors and padding using Figma-like tools and express rich interactions by prompting AI in natural language.
Builder's design to code process includes an interactive preview mode that goes beyond Figma prototyping and allows designers to implement animation and interactivity for their components and even connect and preview live data sources. These are responsive, web-ready prototypes that can easily be shared via a URL. Prototyping gives designers and collaborators a live web canvas to further enhance and refine their components before handing them off to the developer team for implementation in the code base.
Think of the interactive prototype as detailed and living specifications for how the component will look and behave. Starting with this one source of truth makes it possible to generate components in different frameworks or platforms that look and behave similarly.
DEVELOPMENT STAGE
Development stage
TOOLS USED:

Builder Visual Copilot & Builder CLI

Git
Generating code
Once the functionality is completely defined in the interactive prototype, the next step is for the development team to generate production code for your codebase.
This is where developers choose between a variety of code frameworks as output targets, such as React, Vue, Angular, Svelte, React Native, SwiftUI, HTML, Qwik, Solidjs, Jetpack Compose, or Flutter.
For styling frameworks, built-in support includes Tailwind, CSS, CSS modules, Styled Components, Emotion, and developers can always add other requirements or technologies using custom instructions.
Generating code inside the Builder application
The Builder interface has a develop mode with settings that can be used to control how code is generated. Once the code is generated, developers can use the interactive chat to suggest changes or improvements until they are happy with the implementation.
The code can be brought inside your codebase via a simple copy and paste, but because generated code often spans multiple files, Builder provides a command line to sync all the code to your local environment with one command.
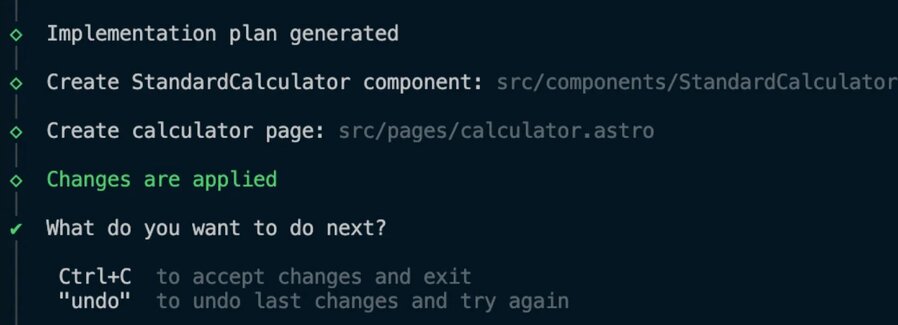
Generating code with the interactive CLI
Code can also be generated in place, right from any IDE or terminal in a model that almost resembles pair programming with the AI assistant. The Builder Figma plugin provides an option to copy a terminal command percolated with the ID of the design prototype. Then you can use the interactive CLI prompts to tell the AI exactly how you'd like to generate code that integrates cleanly into your codebase.
Tip: Because it runs locally from inside your project directory, the Builder CLI application automatically provides the AI relevant context about your project: frameworks, file structure, coding standards, existing components, etc. While you can still provide custom instructions with a .builderfile , most developers find the project context helps the AI get to impressive results.
Adding the code to your code base
It's important to note that Builder does not automatically commit, host, or maintain your code. Instead it provides paths for your developers to easily integrate the code, extend the code with additional functionality, and craft their own commits to the repository.
Incorporating future design changes
With even the best handoff and review process in place, its common for design to evolve or be updated after the code for the component has already been generated, adjusted, and extended by a developer with custom functionality.
Builder allows developers to re-export a Figma design and have the changes applied as a code diff rather than generating new files. As it makes adjustments, the AI will respect and preserve the code and functionality developers have already implemented.


Section 6
Running a pilot project in your organization
1
Before the project, establish a baseline covering your current design to code workflow and allow team members to provide input that addresses their needs and potential time savings from using AI automation for the design to code process. We've created a quick survey you can modify and send to your team as well as some topics you can use as guidance to meet and discuss the pilot project.
2
Provide your team an overall familiarity with the workflow and tools used so they understand the process and how it will impact the way they work together. We've created clear one-page handouts for both your design team and development team and you can share sample design files and generated output so they can explore the process. We also have a simple handout for your infrastructure team, security team, or anyone in leadership who wants to understand how code is generated and the privacy and security mechanisms that are in place.
3
Select a UI task to serve as the pilot project. It's best to pilot a single page of a website or a single screen of an application. Something that can be implemented in a single commit but involves perhaps 3-4 subcomponents as well.
4
Have the team share and discuss the results and provide them these troubleshooting steps in case the output is not what was intended or doesn't match the original design file.
5
Have team members track observations, challenges, and questions in a shared document.
6
Our engineers at Builder would be happy to meet with your team, respond to questions, and offer tips and suggestions for improvements to the workflow.
Builder is here to help
Builder has been on the forefront of design to code automation and our daily mission is to help organizations get from idea to production as fast as possible. We'd be happy to talk to your team and share the learnings and best practices from other organizations who have applied automation to similar projects.


